This website uses cookies so that we can provide you with the best user experience possible. Cookie information is stored in your browser and performs functions such as recognising you when you return to our website and helping our team to understand which sections of the website you find most interesting and useful.
Get Started With Advanced Datatable

Sandeep Kumar Mishra
September 14, 2024
5 minutes read
Welcome to the complete guide on setting up the Advanced Datatable plugin. This powerful Gutenberg block plugin helps you create dynamic, responsive, and customizable data tables directly from the WordPress editor. Whether you’re showcasing blog posts, products, or custom post types, Advanced Datatable offers an easy way to present your data in a visually appealing format. With features like pagination, sorting, filtering, and search functionality, site admins can fully control how data is displayed. Let’s get started and explore how to install and configure this plugin.
Follow these simple steps to set up this plugin:
-
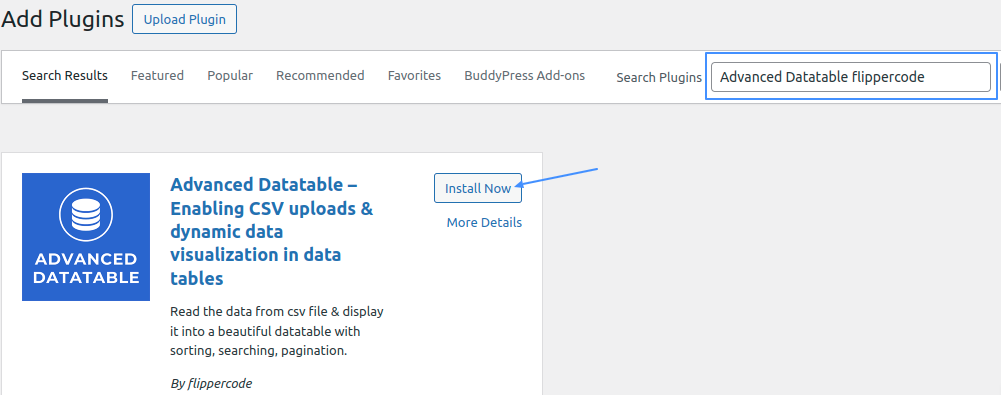
- Step 1: Log into your WordPress back-end, and go to the Plugins page. Find the Advanced Datatable plugin in the list and click Activate.
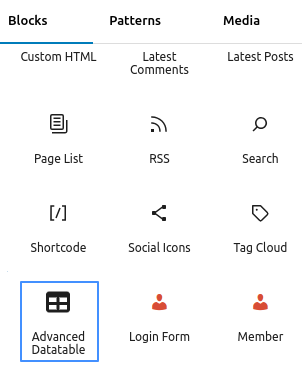
- Step 2: The Advanced Datatable block can be found under the Widgets category when you click on the plus icon to add a Gutenberg block to a page.
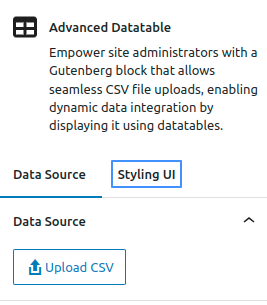
- Step 3: When you open the plugin, you will see two main sections:Data Source
Styling UI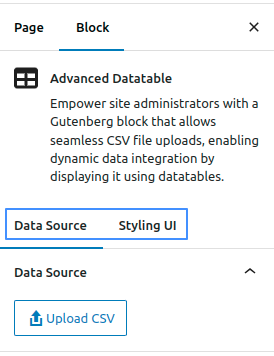
- Step 1: Log into your WordPress back-end, and go to the Plugins page. Find the Advanced Datatable plugin in the list and click Activate.
Data Source Setup for Advanced Datatable Plugin
-
- Step 1: Navigate to the Data Source section within the plugin interface.
- Step 2: Upload your .csv file by clicking the Upload button. Ensure your CSV file is formatted correctly for proper data import.
- Step 3: Once the file is uploaded, the plugin will process the CSV and display the data in a preview format.
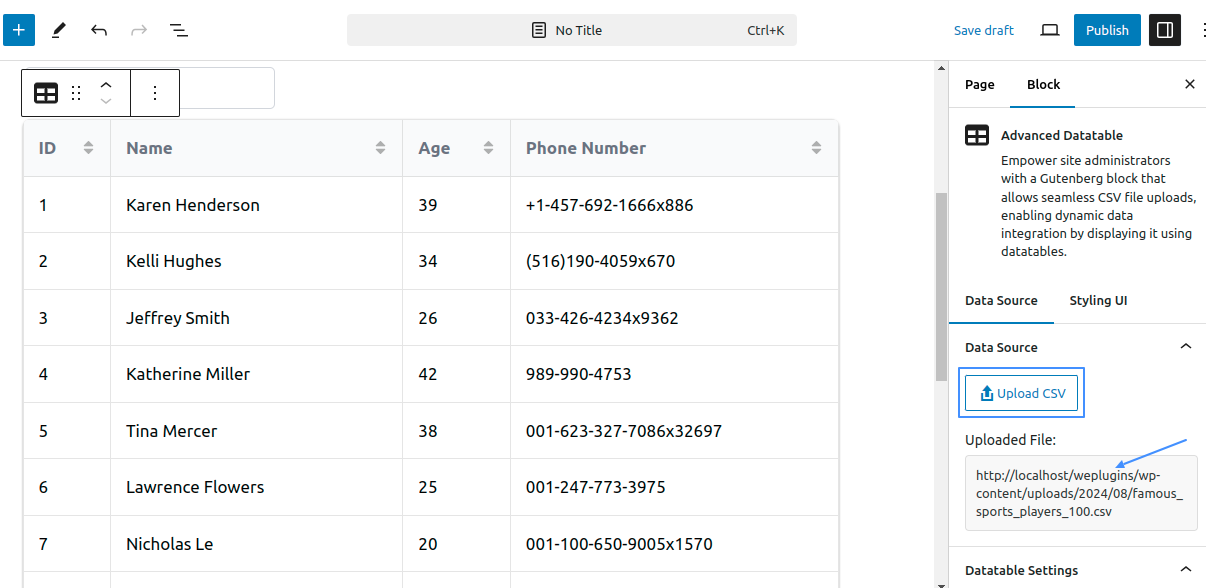
- Step 4: Configure additional settings for your datatable. This includes:Enable Column Sorting: Toggle this option to allow users to sort columns in the table.
Enable Search Bar: Add a search bar above the table to enable users to quickly find data.
Rows Per Page: Define how many rows are displayed per page of the table.
Table Width: Set the width of the table, either in pixels or as a percentage.
Table Height: Adjust the height of the table to accommodate more data, with options for scrollable content.
Sticky Table Header: Enable this feature to keep the table header visible when scrolling through long data lists.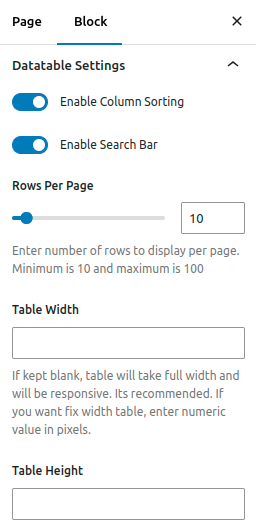
- Step 5: Save your settings by clicking the Save button to apply the changes.
After completing these steps, your datatable will be populated with data from the CSV file, and you can proceed to customize its appearance in the Styling UI section.
Styling UI for Advanced Datatable Plugin
- The Styling UI section allows you to customize the appearance of your datatable to match your website’s design. This section is divided into three main areas where you can apply CSS styling to different parts of the datatable.
- Step 1: Navigate to the Styling UI section within the plugin interface.
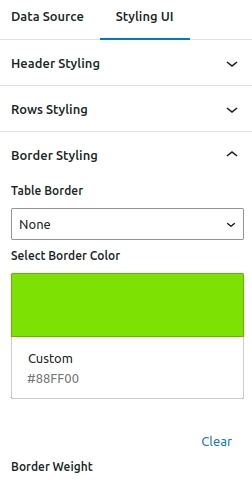
- Step 2: You will find three sub-sections for styling your datatable:Header Styling: Customize the table header’s appearance, including text color, background color, and font size.
Row Styling: Define the styles for individual rows, such as alternating row colors, text alignment, and row height.
Border Styling: Set the border properties for the table, including border width, color, and style (e.g., solid, dashed). - Step 3: For each section, enter your desired CSS styles in the provided input fields. You can use standard CSS properties to achieve your desired look.
- Step 4: Review your changes in the live preview to ensure the styling meets your expectations.
- Step 5: Save your styling settings by clicking the Save button to apply the changes to your datatable.
Once you have completed the styling configuration, your datatable will reflect the updated design, enhancing the visual appeal and integration with your website’s theme.
Explore the latest in WordPress
Trying to stay on top of it all? Get the best tools, resources and inspiration sent to your inbox every Wednesday.