This website uses cookies so that we can provide you with the best user experience possible. Cookie information is stored in your browser and performs functions such as recognising you when you return to our website and helping our team to understand which sections of the website you find most interesting and useful.
How to change text settings?

Sandeep Kumar Mishra
October 28, 2016
5 minutes read
To change the text of feedback review question,positive button label, negative button label, thank you message, already voted message and Submit button value of frontend.
Terminology:
-
Access Plugin Settings
Start by clicking on the Settings menu of the Was This Helpful Plugin.
-
Configure Text Settings
On the backend Settings page, scroll down until you reach the Text Setting section. You can adjust the text settings as needed. Refer to the image below for visual guidance:
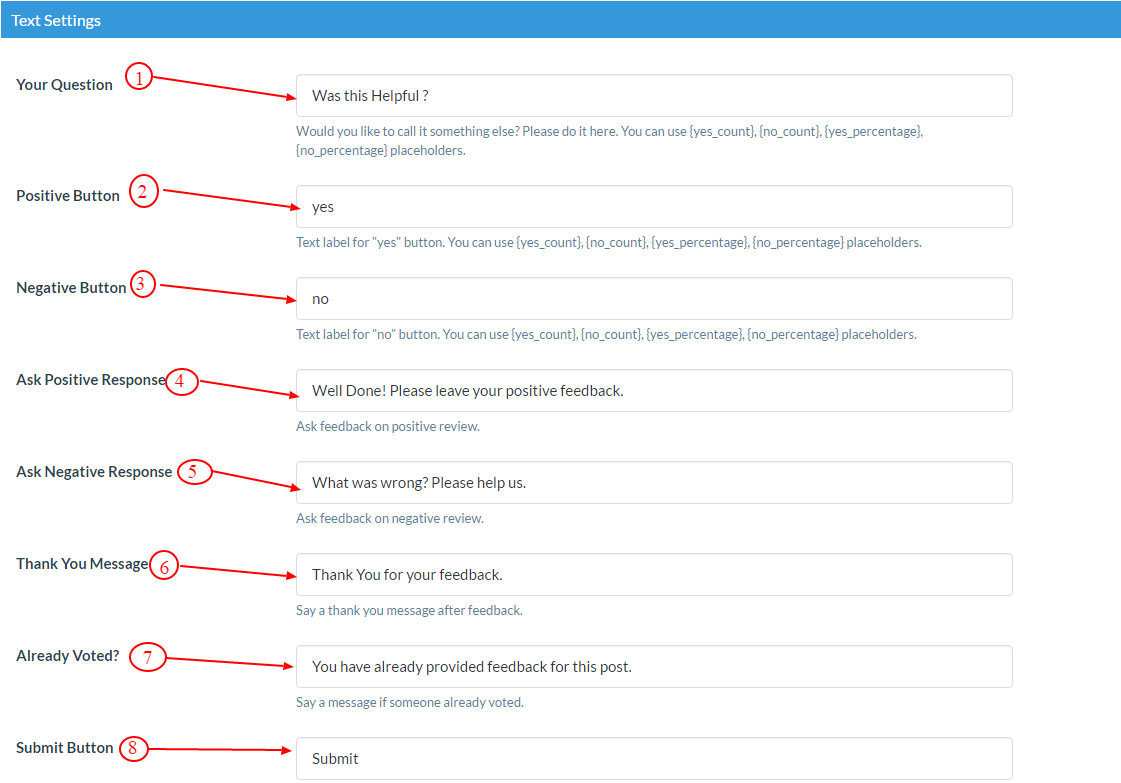
1. Change the Review Question:
– To modify the review question, simply type your desired question.
2. Change the Positive Button Label:
– To customize the label of the positive feedback button, enter the desired button name. You can also use placeholders like `{yes_count}` to show the total number of customers who rated your post/page positively, or `{yes_percentage}` to display the positive rating as a percentage.
3. Change the Negative Button Label:
– For the negative feedback button label, enter your preferred button name. You can use placeholders like `{no_count}` to display the total number of customers who rated your post/page negatively, or `{no_percentage}` for the negative rating in percentage.
4. Modify Positive Review Response:
– Write your desired response to positive reviews.
5. Modify Negative Review Response:
– Write your preferred response to negative reviews.
6. Customize the Thank You Message:
– To change the thank you message, enter your new message.
7. Update the Already Voted Message:
– Modify the message displayed when a user has already voted.
8. Change the Submit Button Label:
– You can even customize the label of the “Submit” button by entering your desired button name.
Note:- You can replace your Positive Button value in Negative Button value,same Negative Button value in Positive Button value.Example type no,{no_count},{no_percentage} in Positive Button and type yes,{yes_count},{yes_percentage} in Negative Button.
Placeholder:-
{yes_count}=> count the total number of positive feedback.
{yes_percentage} => Count the total number of positive feedback in percentage(%).
{no_Count}=> Count the total number of negative feedback.
{no_percentage}=> Count the total number of negative feedback in percentage(%).
Step by step explanation of each point
Example:
As an IT Company developed a new plugin and wants to launch it in the market. Before placing it in the market, the company distributes the plugin to staff members so they can gather feedback and reviews:
1. Ask a Question:
– Start by asking the staff members a simple question: “Do you like this plugin?” This serves as the initial prompt to collect their feedback.
2. Positive Response (Yes/Best):
– Provide two options for positive responses: “Yes” or “Best.” This allows staff members to express their satisfaction with the plugin.
3. Negative Response (No/Bad):
– Offer two options for negative responses: “No” or “Bad.” This lets staff members indicate their dissatisfaction with the plugin.
4. What You Like Most:
– Encourage staff members to share what they like most about the plugin. This question helps identify the strengths and highlights of the plugin.
5. What Is the Worst Thing:
– Similarly, prompt staff members to specify what they find as the worst aspect of the plugin. This helps identify areas for improvement.
6. Thank You Message:
– After collecting the feedback, express gratitude by thanking staff members for providing their positive or negative reviews. Acknowledging their input is important.
7. Limit Reviews:
– Implement a rule to ensure that no one can review the plugin more than two times. This prevents repeated feedback and maintains fairness in the evaluation.
8. Submit Your Reviews:
– Finally, provide a way for staff members to submit their reviews. This step allows them to share their thoughts on the plugin officially.
Now click on Save Setting button at the bottom of Settings page.
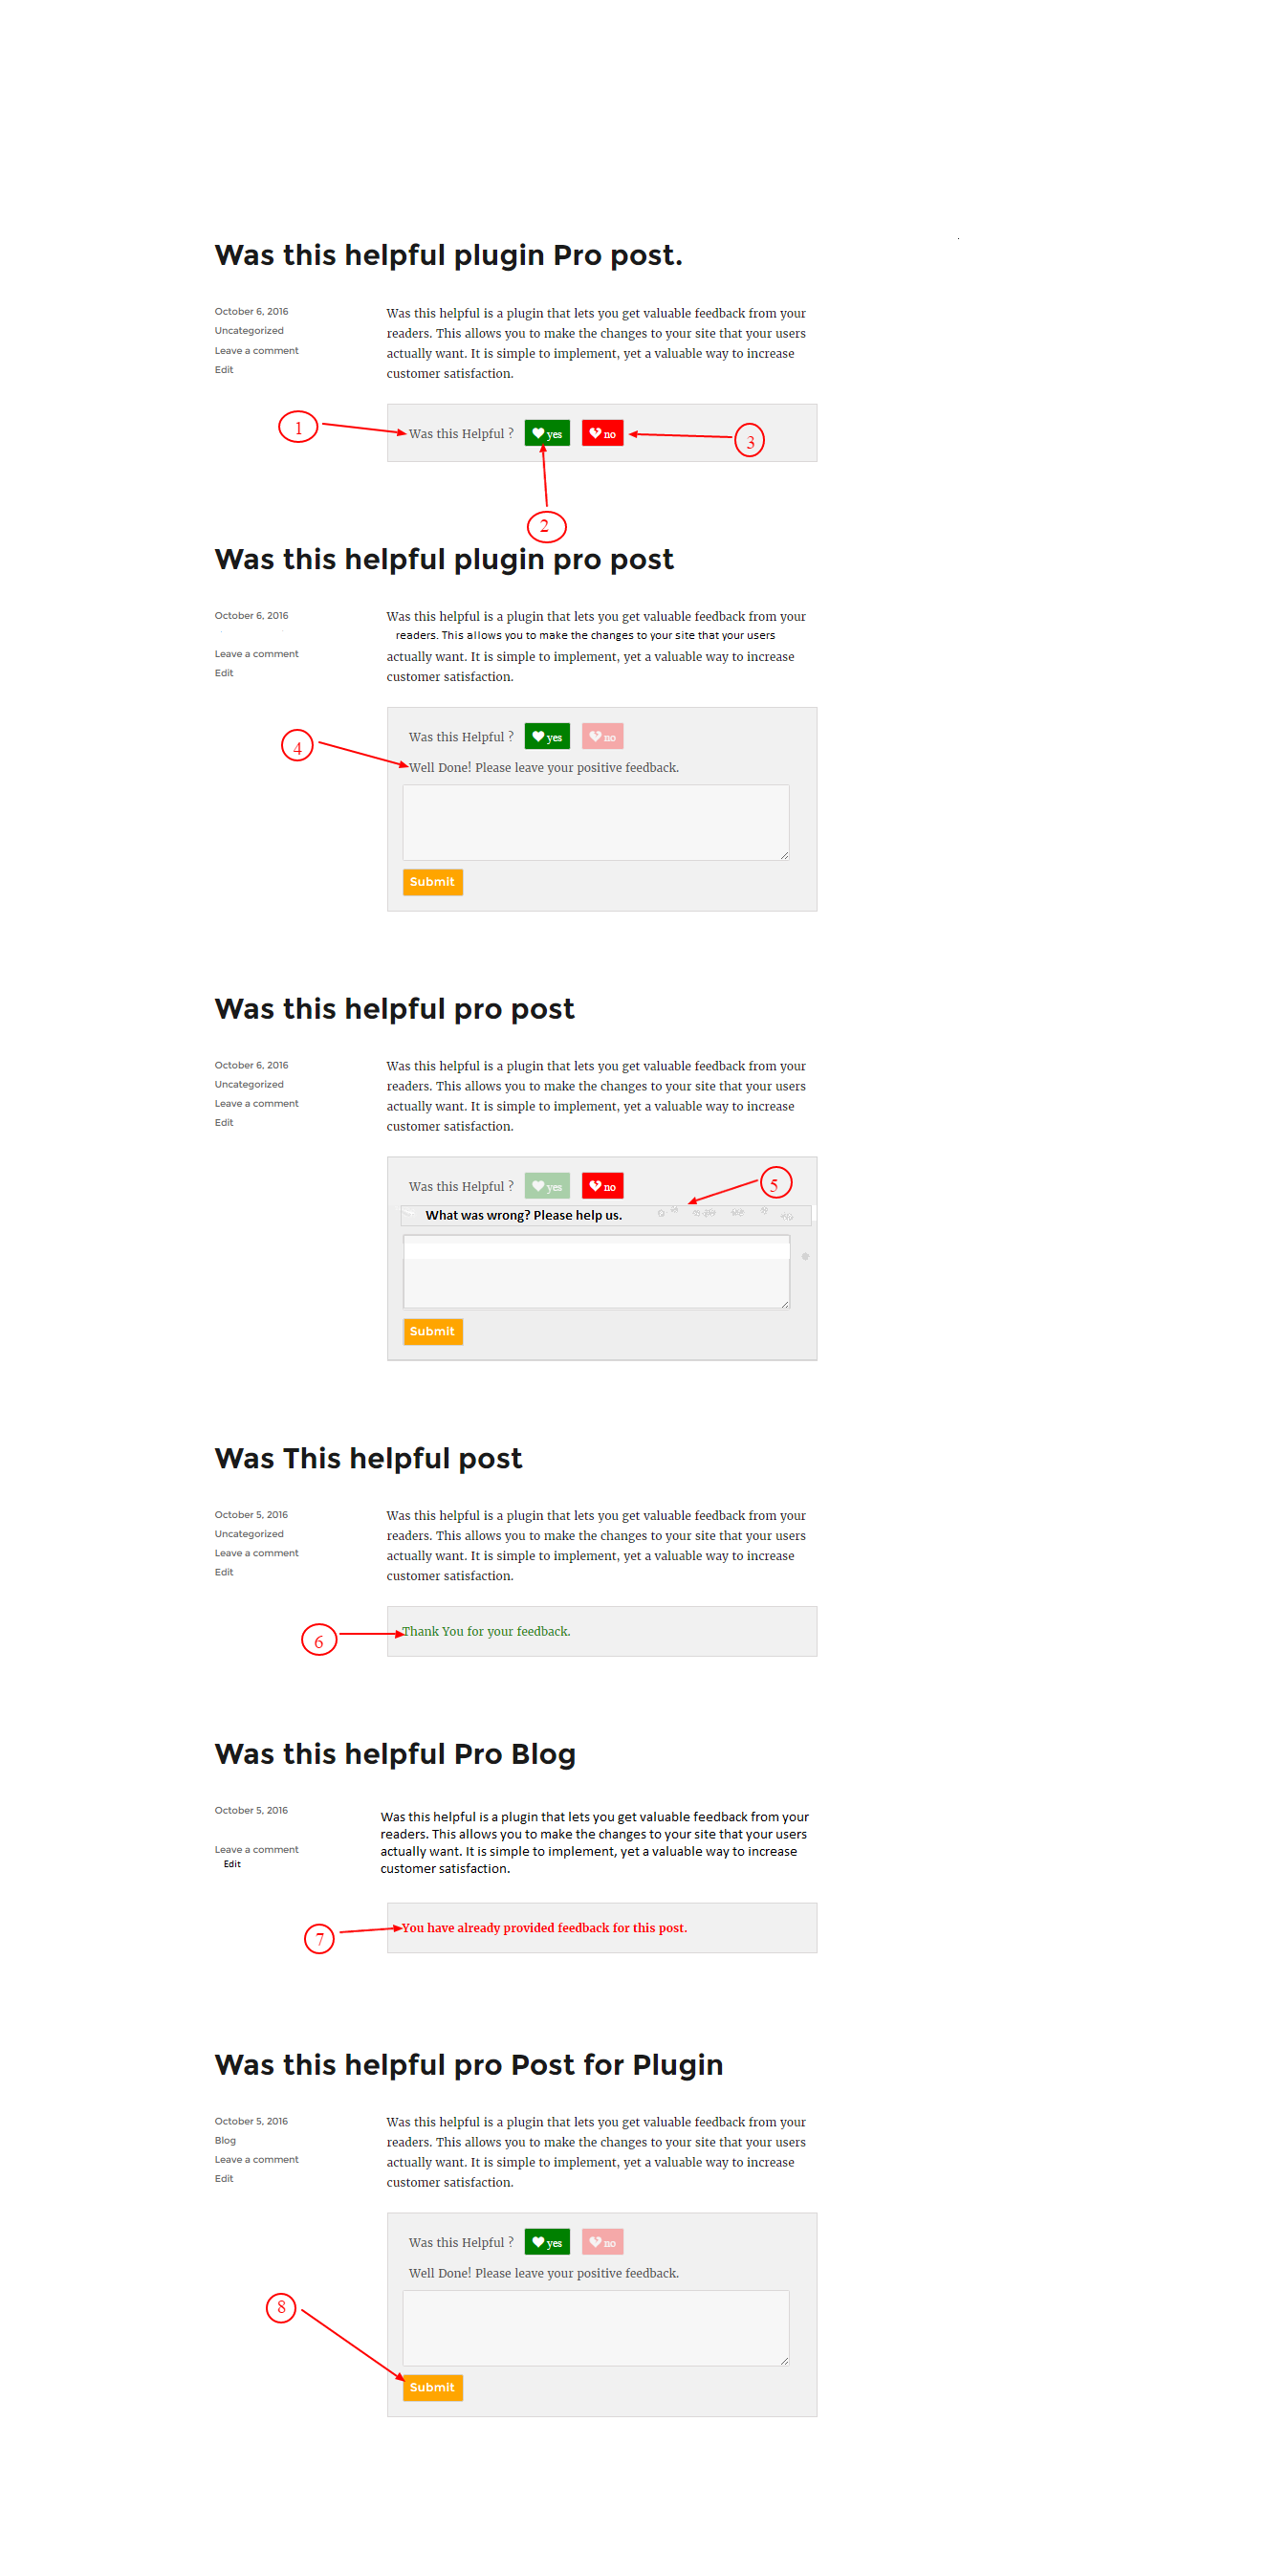
1.)The text of question updated in Was this helpful ?.
2.) Positive Button label name updated in yes
3.) Negative Button label name updated in no
4.)Positive Review Response text updated Well Done! Please leave your positive feedback..
5.) Negative Review Response text updated in What was wrong? Please help us.
6.) Thank You Message updated in Thank You for your feedback.
7.) Already voted message updated in You have already provided feedback for this post.
8.) Submit Button name updated in Submit
Explore the latest in WordPress
Trying to stay on top of it all? Get the best tools, resources and inspiration sent to your inbox every Wednesday.