This website uses cookies so that we can provide you with the best user experience possible. Cookie information is stored in your browser and performs functions such as recognising you when you return to our website and helping our team to understand which sections of the website you find most interesting and useful.
How to Create an OpenAI API Key

Sandeep Kumar Mishra
January 13, 2026
5 minutes read
This guide explains how to create an OpenAI API key and use it with WP AI Content Pro. Follow these steps carefully to ensure your key is generated and configured correctly.
Step 1: Create or Sign In to an OpenAI Account
- Open your web browser and visit https://platform.openai.com.
- Click Sign up if you don’t have an account, or Log in if you already have one.
- Complete the sign-up or login process.
Step 2: Access the API Keys Page

- After logging in, click on API keys page to manage api keys.
- From the menu, select View API keys.
This will open the page where you can manage your API keys.
Step 3: Create a New API Key
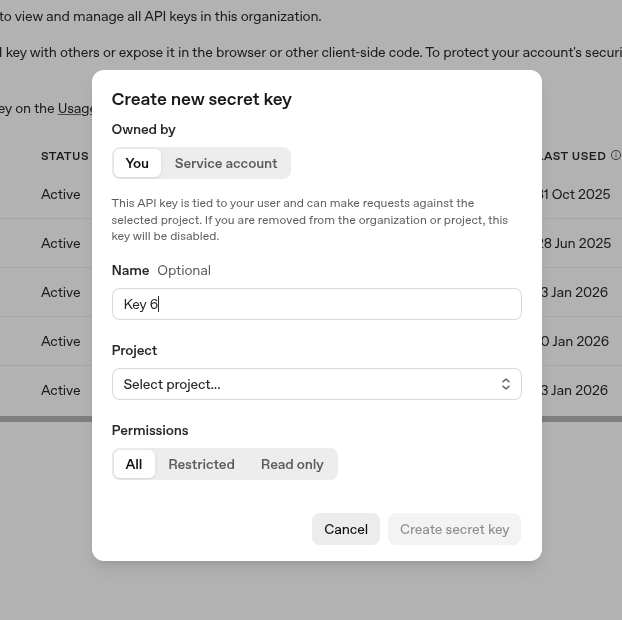
- Click the Create new secret key button.
- Restricting your API Key is highly recommended. Use Restricted tab and setup following permission to use in WP AI CONTENT PRO plugin.
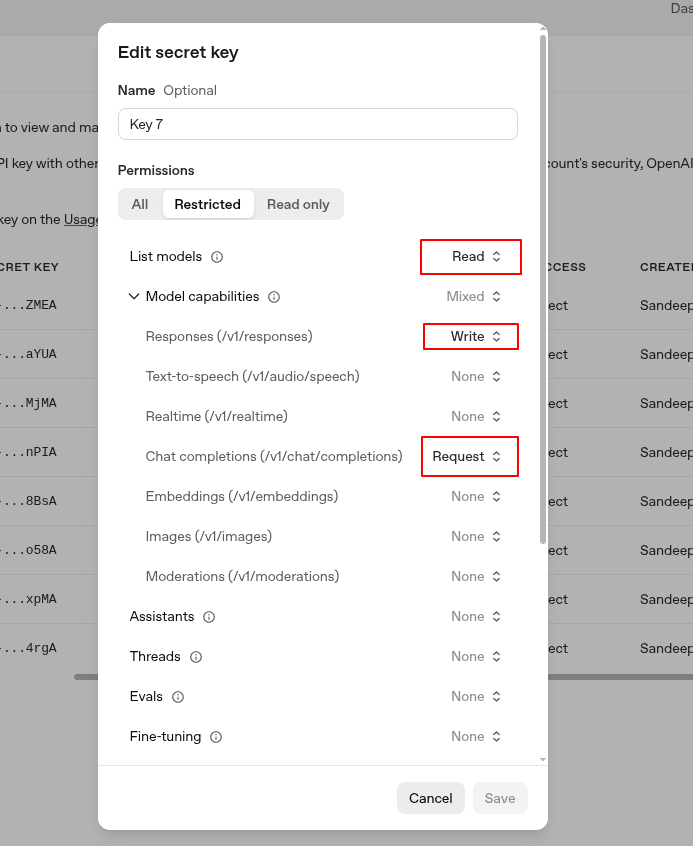
- List Models – Read
- Responses(/v1/responses) – Write
- Chat completions(/v1/chat/completions) – Request
- A new API key will be generated instantly.
- Copy the key and store it securely.
Important: You will only see the full API key once. If you lose it, you must generate a new one.
Step 4: Add the API Key to WP AI Content Pro
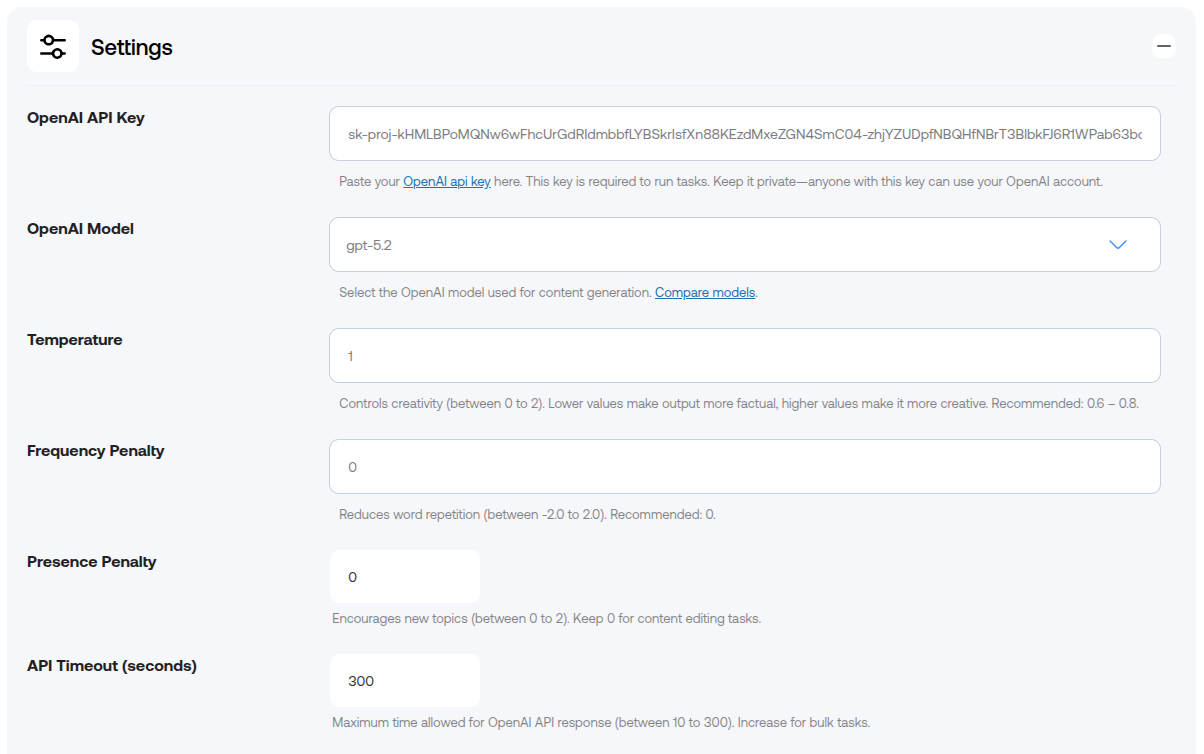
- Log in to your WordPress admin panel.
- Go to WP AI Content Pro → Settings.
- Paste the API key into the OpenAI API Key field.
- Click Save Settings.
If the key is valid, the plugin will be ready to generate AI content.
Security Best Practices
- Do not share your API key publicly.
- Do not commit the API key to version control (Git).
- Regenerate the key immediately if you believe it has been exposed.
- Use only one key per site when possible.
Troubleshooting API Key Issues
Invalid API Key
- Ensure there are no extra spaces before or after the key.
- Make sure the key starts with sk-.
- Verify the key is active in your OpenAI account.
API Key Not Working
- Check that your OpenAI account has an active billing setup.
- Generate a new key and update it in the plugin settings.
Next Step
Once your OpenAI API key is configured, you can start creating tasks and applying them to your WordPress content.
Continue to: Creating & Managing Tasks
Explore the latest in WordPress
Trying to stay on top of it all? Get the best tools, resources and inspiration sent to your inbox every Wednesday.