This website uses cookies so that we can provide you with the best user experience possible. Cookie information is stored in your browser and performs functions such as recognising you when you return to our website and helping our team to understand which sections of the website you find most interesting and useful.
A user can give a different style of pagination in listing. Here some Pagination styles are given he can choose one of them. Out of pagination style one of them is Carousel. It makes a better look of pagination. For a user it is very easy to apply Carousel in listing.

Here some steps are given follow to apply Carousel :-
-
Access Template Management
Begin by clicking on the Manage Templates menu of the WP Post Pro Plugin. This will open a new window displaying a list of available templates.
-
Select Template for Editing
Choose one of the templates from the list to apply changes to the post listing, and then click on the “Edit” link for that template.
-
Configure Pagination Settings
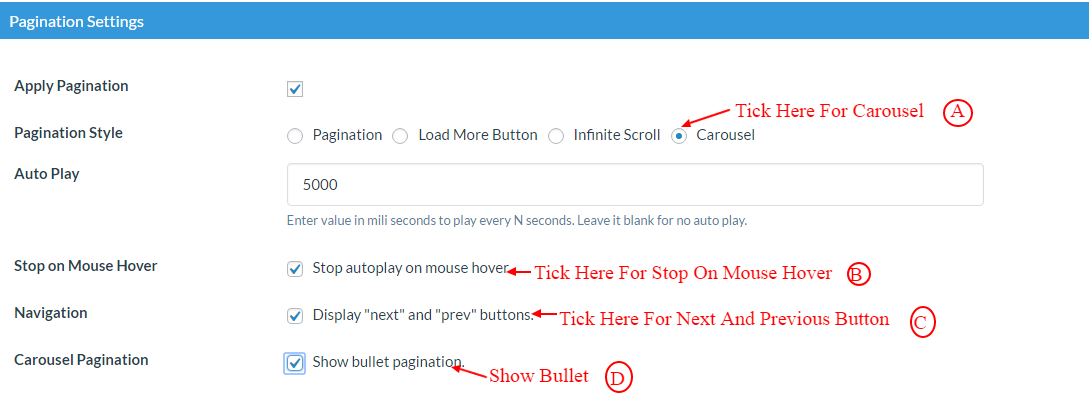
Scroll down to the Pagination Settings section and check the Apply Pagination option. This will reveal additional options.
-
Choose Carousel Style
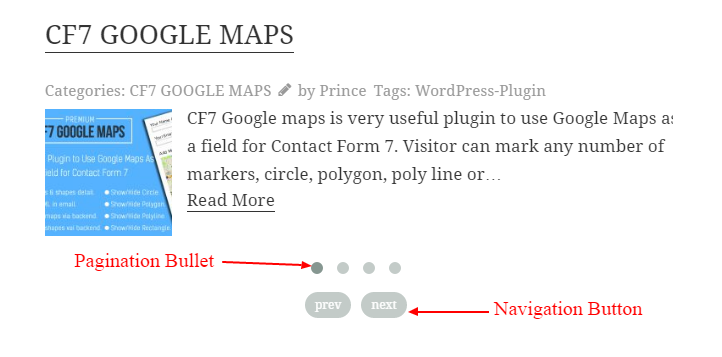
Tick the Carousel option to create a stylish carousel-style pagination. This style displays one post per page, and the remaining posts are shown automatically. Additional options will appear:
- Auto Play: Set the time interval for transitioning to the next post. Leave it blank to disable auto-play.
- Stop on Mouse Hover: This option pauses auto-play when you hover your mouse over the post area.
- Navigation: Choose to display Next and Previous buttons on the listing.
- Carousel Pagination: Enables the display of bullet points to navigate between posts.
-
Save Template Changes
Finally, click on the Save Template button at the end to apply the changes. You can see the settings for reference in the image below:

Explore the latest in WordPress
Trying to stay on top of it all? Get the best tools, resources and inspiration sent to your inbox every Wednesday.
