This website uses cookies so that we can provide you with the best user experience possible. Cookie information is stored in your browser and performs functions such as recognising you when you return to our website and helping our team to understand which sections of the website you find most interesting and useful.
Integrating your WordPress users with Google Maps has never been easier, thanks to the WP MAPS PRO plugin extension. This feature-rich extension allows you to display registered users on a Google Map, complete with detailed information in the info window and listings. With the ability to categorize users by roles, you can create a visually appealing and functional map display.
Step-by-Step Guide to Display WordPress Users on Google Maps
- Step 1: Navigate to Add or Edit Map
Begin by navigating to the Add or Edit Map section in your WordPress dashboard. Scroll down until you locate the WP Users on Map (Add-On Settings) area.
- Step 2: Enable the Addon
In the WP Users on Map (Add-On Settings) section, activate the addon by checking the Enable Addon checkbox. Don’t forget to save your settings to apply the changes.

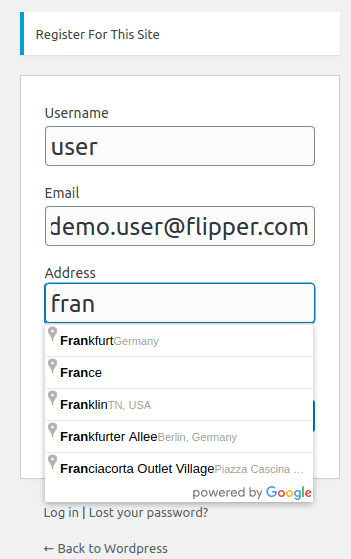
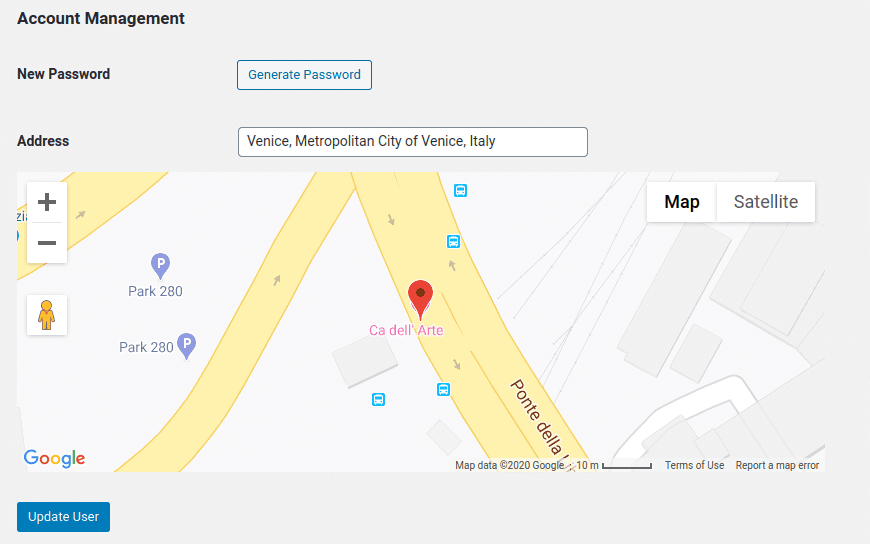
Once enabled, an Autosuggest Address Field will appear on the Register/Edit user profile page, as shown in the screenshots below:

For the Admin Edit User Page:

- Step 3: Create Marker Categories
To assign icons to user roles, first create a marker category. Go to WP MAPS PRO -> Add Marker Category in your dashboard. You can name these categories based on your preferences or user roles.

After creating the categories, you can assign a specific marker icon to each user role using the WP MAPS PRO plugin.
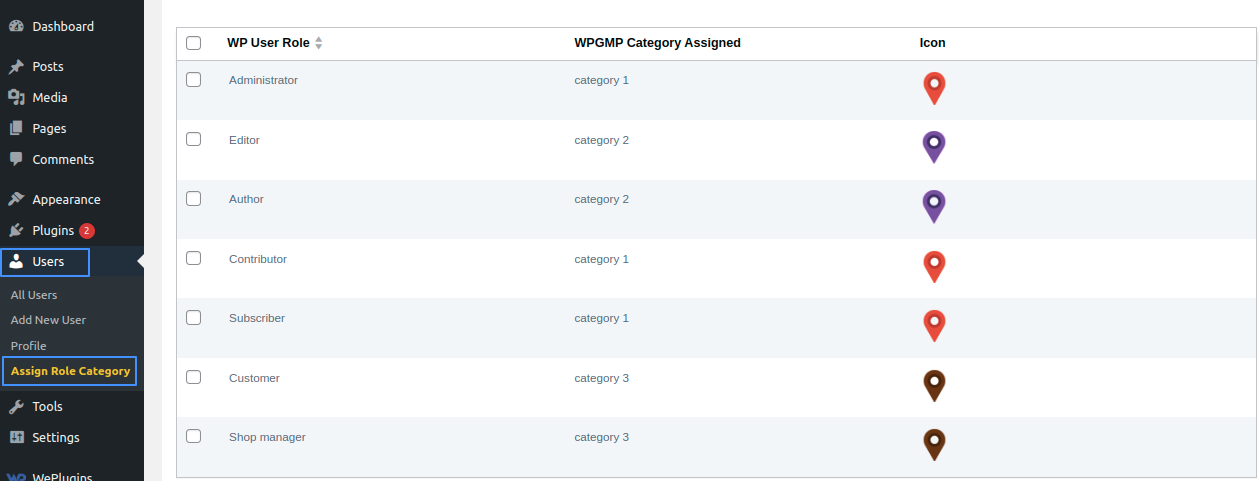
- Step 4: Assign Role Categories
Navigate to Users -> Assign Role Category. Here, all user roles will be displayed. Click on the edit link of any user role to access the Assign Category page. Choose the appropriate Google Maps marker category for each role, then save your selections.

- Step 5: Select Roles to Display
Go back to Add or Edit Map and scroll to the Select Roles to Display section in WP Users on Map (Add-On Settings). Choose which roles you want to display on the map and save your configuration.

- Step 6: View the Map
After configuring your settings, only the selected user roles will be displayed on your Google Map, providing a clear and organized view of your WordPress users.
Assign Marker Icons to WordPress User Roles
Display Selected WordPress User Roles on the Map
Explore the latest in WordPress
Trying to stay on top of it all? Get the best tools, resources and inspiration sent to your inbox every Wednesday.
