This website uses cookies so that we can provide you with the best user experience possible. Cookie information is stored in your browser and performs functions such as recognising you when you return to our website and helping our team to understand which sections of the website you find most interesting and useful.

Step 1: Export NextGEN Albums, Galleries, and Pictures Using phpMyAdmin

First, you need to export the three tables mentioned above from your current WordPress installation. Here’s how you can do it:
- Log in to your phpMyAdmin panel.
- Navigate to the database that contains your WordPress installation.
- Select the tables wp_ngg_album, wp_ngg_gallery, and wp_ngg_pictures.
- Click on the “Export” tab and choose the export method that suits you (Quick or Custom).
- Download the exported SQL file to your computer.
Step 2: Import NextGEN Albums, Galleries, and Pictures to the New Website
Next, import the exported tables into the new WordPress installation:
- Log in to the phpMyAdmin panel of your new host.
- Navigate to the database that contains your new WordPress installation.
- Click on the “Import” tab.
- Choose the SQL file you exported earlier.
- Click “Go” to import the tables into the new database.
Step 3: Transfer NextGEN Pictures to New Website

To ensure that your images are transferred correctly, follow these steps:
- Create a folder named ngg in the wp-content directory of your new WordPress installation.
- Copy all the pictures from the ngg folder in your old WordPress installation to the new one.
This step is crucial to avoid any errors when you activate the NextGEN Gallery plugin on your new site.
Step 4: Scan Folder for New Images in NextGEN Gallery Plugin
Finally, ensure that all images are correctly detected by following these steps:
- Log in to your new WordPress admin panel.
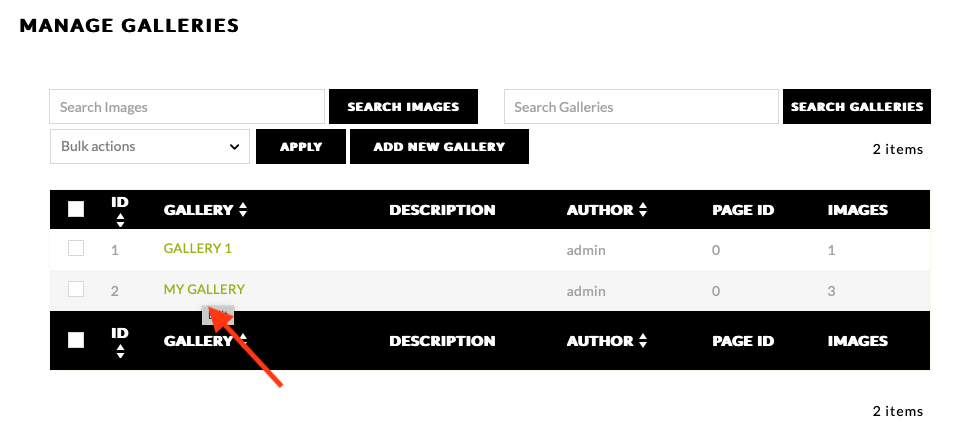
- Go to the Manage Galleries.
- Choose the gallery if you want to update.

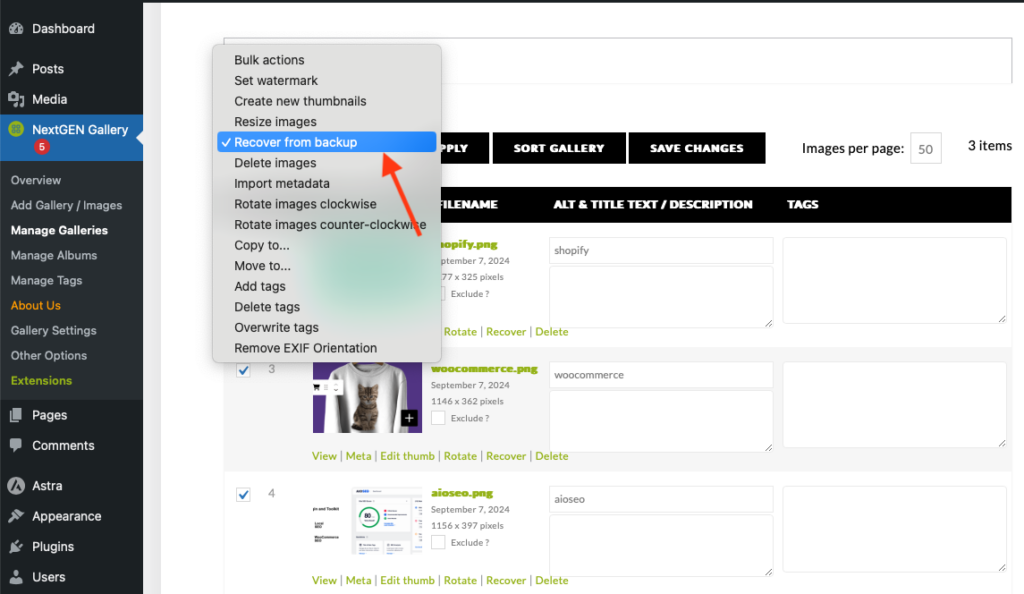
- Click on “Restore from Backup” for each gallery.

This step is optional if you do not encounter any errors such as “no gallery found”.
Troubleshooting
If you encounter any issues displaying your galleries, consider the following:
- Check and clear your cache.
- Ensure that all images have been correctly uploaded to the new site.
- Review the NextGEN Gallery settings to verify that all galleries are correctly configured.
If problems persist, feel free to contact us. We are here to assist you with our best availability.
Explore the latest in WordPress
Trying to stay on top of it all? Get the best tools, resources and inspiration sent to your inbox every Wednesday.


