This website uses cookies so that we can provide you with the best user experience possible. Cookie information is stored in your browser and performs functions such as recognising you when you return to our website and helping our team to understand which sections of the website you find most interesting and useful.

A WordPress theme is a collection of template files that decide the layout and behavior of your WordPress site. Themes contain information about the design of the website and other elements such as logos, headers, sidebars, and footers.
There are thousands of free or paid WordPress themes available online. But they are not always 100% suitable for our website, so any person with a little knowledge of HTML and CSS can simply make their own WordPress themes in just one day.
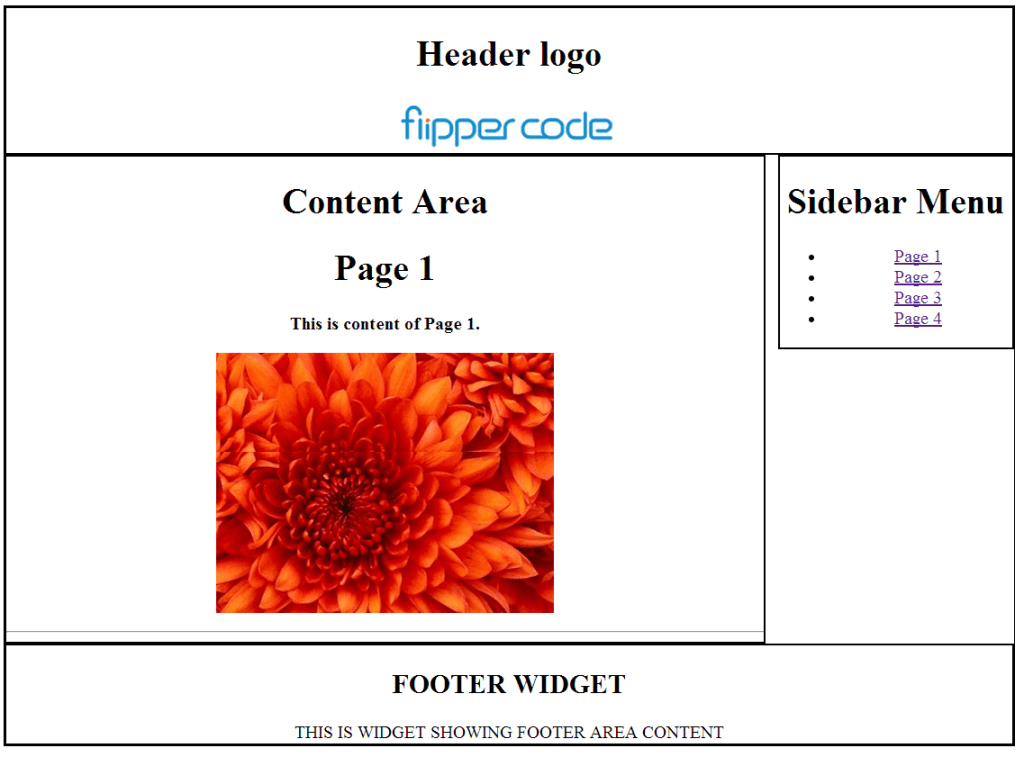
Theme development is a very vast topic. But here we will give you an initial start by discussing a very simple theme. The theme below can help you find the basic structure and working of a theme. While working on this theme, you can also find the answers to these questions:
- How to add a logo in the Header area?
- How to add a Menu in the Sidebar?
- How to see the content of your WordPress Page or Post?
- How to add a widget in your footer area?

To create a theme, first, it should be divided into four components: Header, Footer, Sidebar, and Content area. Start working on each component one-by-one.
How to Activate your Theme?

Premium Plugins Bundle
WordPress themes exist in a folder inside the /wp-content/themes/ directory in your WordPress installation. Index.php and style.css are the two main files. Without them, we can’t make and activate any theme.
Make a new folder named My First Theme (you can give it any name) in /wp-content/themes/. Add index.php, style.css, and screenshot.png in this folder.

1. index.php – keep this file blank (we will edit it later).
2. style.css – Add just basic information about your theme. Add the following code inside your style.css.
/*
Theme Name: My New Theme
Description: First theme developed by me.
Author: Your Name
Author URI: http://www.yourname.com
*/
3. screenshot.png – Take a screenshot of any website and make a PNG file using a tool like Windows Paint, or take any PNG picture. Without this, you will see only a blank icon in Appearance -> Themes.
When you go to Appearance -> Themes, you will now see the first look of your theme.

To activate this theme, just click on the Activate button. But it will not show anything on visiting your website because our index.php file is blank and other important files are also missing.
header.php File
The header section of the theme is controlled by header.php. In the header section, you can display the menu, company logo, categories, etc. In the given image below, you can see the Flipper Code logo. Here you can find out how to add a logo in the header section.

Copy and Paste this code into your header.php file (delete /*comment*/ after pasting the code)
<!DOCTYPE html>
<html <?php language_attributes(); ?>>
<head>
    <meta charset="<?php bloginfo('charset'); ?>">
    <meta name="viewport" content="width=device-width, initial-scale=1.0">
    <title><?php bloginfo('name'); ?> | <?php is_front_page() ? bloginfo('description') : wp_title(''); ?></title>
    <link rel="stylesheet" href="<?php echo get_stylesheet_directory_uri(); ?>/style.css"> <!-- This code is used to add a stylesheet with the theme -->
    <?php wp_head(); ?>
</head>
<body <?php body_class(); ?>> <!-- We open the body tag in header.php and close it in footer.php -->
<div id="wrapper">
    <div id="header">
        <h1>Header logo</h1>
        <img src="<?php echo get_stylesheet_directory_uri(); ?>/images/logo.png" alt="Logo"> <!-- This code is used to show the image -->
    </div>
In the header.php file, we see most of the part includes HTML codes, but there are only a few PHP codes. One is used to attach the stylesheet to your website, and the other is used to display the logo image. Make a folder named ‘images’ inside your theme and place all images inside this.
You can also specify Meta tags such as Meta description and Meta Keywords in header.php that are essential for SEO of your website.
<img src="<?php echo get_stylesheet_directory_uri(); ?>/images/logo.png" alt="Logo">
The given above function is used to make dynamic paths. So if we change the location of the file or image, this function will automatically change its path. You don’t need to change its path manually. If we look at the source code, this will look like this:
<img src="http://localhost/charleston/wp-content/themes/first-theme/images/logo.png" alt="Logo">
functions.php File
By using functions.php, you can change the default behaviors of WordPress. It is used for adding features and functionality to a WordPress site.
functions.php is used to call functions, both built-in WordPress and PHP, and even you can define your own functions. You can generate the same results by adding code to a WordPress Plugin or through the functions.php file.
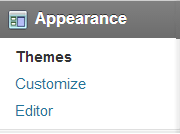
Without functions.php file, we can see only three options in Appearance

After adding the functions.php file, you can see two additional fields in Appearance that are Menu and Widget.

Copy and Paste this code into your functions.php file (delete /*comment*/ after pasting the code)
add_theme_support('menus'); // This code is used to register menus

function weplugins_widgets_init() { // This code is used to register a widget area
    register_sidebar(array(
        'name'          => 'Footer widget', // You can change the name and ID
        'id'            => 'footer_widget',
        'before_widget' => '<div>',
        'after_widget'  => '</div>',
        'before_title'  => '<h2 class="rounded">',
        'after_title'   => '</h2>',
    ));
}
add_action('widgets_init', 'weplugins_widgets_init');
sidebar.php File
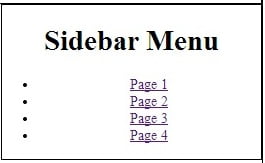
This file is used to control the sidebar section of your WordPress website. In this file, we can use internal WordPress functions to display the Categories, Archives of posts, and sidebar Menus. In this image, you can see the menu. Here we will discuss how to add a menu to your sidebar.

To create a menu, first of all, create pages by clicking on Pages -> Add New and make 4 pages, naming them Page 1, Page 2, Page 3, and Page 4. Add these pages to the menu.
To make the menu, go to Appearance -> Menus, name the menu ‘menu1’, and then click on Save Menu.

After clicking on create menu, now add all pages by checking all checkboxes and clicking on Add to Menu. This will create the menu1 for you.

Copy and Paste this code into your sidebar.php file. (delete /*comments*/ after pasting)
<div id="sidebar">
    <h1>Sidebar Menu</h1>
    <?php wp_nav_menu(array('theme_location' => 'menu1')); ?> <!-- This code is used to call the Menu. -->
</div>
footer.php File
This file is used to control the footer section of your WordPress website. In your footer section, you can display the menu, social icons, copyrights, etc.


Copy and Paste this code into your footer.php file. (delete /*comment*/ after pasting the code)
<div id="footer">
    <?php dynamic_sidebar('footer_widget'); ?> <!-- This PHP code is used to call the widget -->
</div>
<?php wp_footer(); ?>
</body>
</html>
index.php File
The index file is the most important file. It is used for many purposes like calling header.php, footer.php, and sidebar.php. It also contains The Loop (PHP code), which is used to get the content from WordPress pages or posts. Without it, you are unable to see any content on your website.
You can show the content of all pages just by clicking on the menu. One important thing is that only the content part is changed; the header, footer, and sidebar almost remain the same for all websites. In this image, you can see just simple.
Copy and Paste this code into your index.php file. (delete /*comment*/ after pasting the code)
<?php get_header(); ?> <!-- Used to call header.php -->
<div id="main">
    <div id="content">
        <h1>Content Area</h1>
        <?php if (have_posts()) : while (have_posts()) : the_post(); ?> <!-- THE LOOP (Used to extract content from page/post) -->
            <h1><?php the_title(); ?></h1>
            <?php the_content(__('(more...)')); ?>
            <hr>
        <?php endwhile; else: ?>
            <p><?php _e('Sorry, no posts matched your criteria.'); ?></p>
        <?php endif; ?>
    </div>
    <?php get_sidebar(); ?> <!-- This code is used to call sidebar.php -->
</div>
<div id="delimiter"></div>
<?php get_footer(); ?> <!-- This code is used to call footer.php -->
style.css File
The stylesheet is a type of template file consisting of font and layout settings to give a uniform look to your WordPress theme.
Copy and Paste this code into your style.css file.
/*
Theme Name: My New Theme
Description: First theme developed by me.
Author: Your Name
Author URI: http://www.yourname.com
*/

body { text-align: center; }
#wrapper { display: block; border: 1px #000 solid; width: 90%; margin: 0 auto; }
#header { border: 2px #000 solid; }
#content { width: 75%; border: 2px #000 solid; float: left; }
#sidebar { width: 23%; border: 2px #000 solid; float: right; }
#delimiter { clear: both; }
#footer { border: 2px #000 solid; }
#title { font-size: 11pt; font-family: verdana; font-weight: bold; }
Conclusion
Creating your own WordPress theme is a rewarding endeavor that can be accomplished with some basic knowledge of HTML, CSS, and a bit of PHP. Throughout this guide, we’ve broken down the essential components: Header, Footer, Sidebar, Content area, and the vital template files like index.php, style.css, header.php, functions.php, sidebar.php, and footer.php. By following these steps and examples, you can build a basic yet functional theme tailored to your specific needs.
Happy coding!
Explore the latest in WordPress
Trying to stay on top of it all? Get the best tools, resources and inspiration sent to your inbox every Wednesday.


