This website uses cookies so that we can provide you with the best user experience possible. Cookie information is stored in your browser and performs functions such as recognising you when you return to our website and helping our team to understand which sections of the website you find most interesting and useful.
Displays Gravity Form Submissions On Google Maps:
- Step 1: Create a new Gravity Form, navigate to Gravity Form -> New Form or edit your existing form and start building your form.
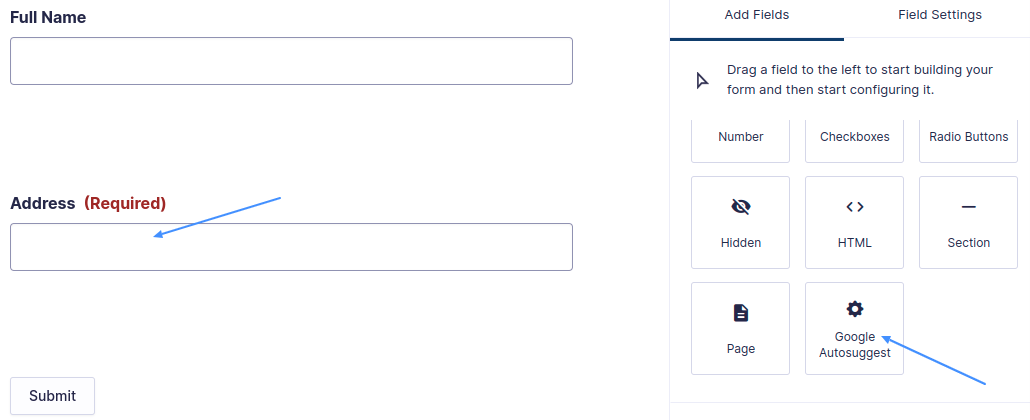
- Step 2: Please add Google Autosuggest type control from Standard Fields section which is registered by our plugin. This field enables google autosuggest feature in frontend form. Users could submit their locations from the frontend.

cf7entry : true (For specifying that submission from this form needs to be saved in the database) cf7entry_title_field : your-name (Name of the field whose value will be displayed as title in info window cf7entry_message_field : your-message (Name of a field whose value will be displayed as main content in info window) cf7entry_featured_image_field : your-image (Name of file control field whose image needs to be saved on a server and later displayed on info window)
- Step 3: After adding all form elements according to you, now update this form.
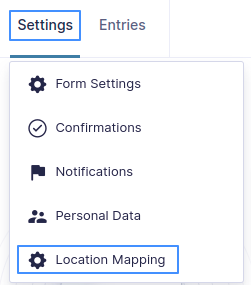
- Step 4: Now we are going to enable location mapping into your selected gravity form navigate to Settings-> Location Mapping. It’s connect form field to locations field.

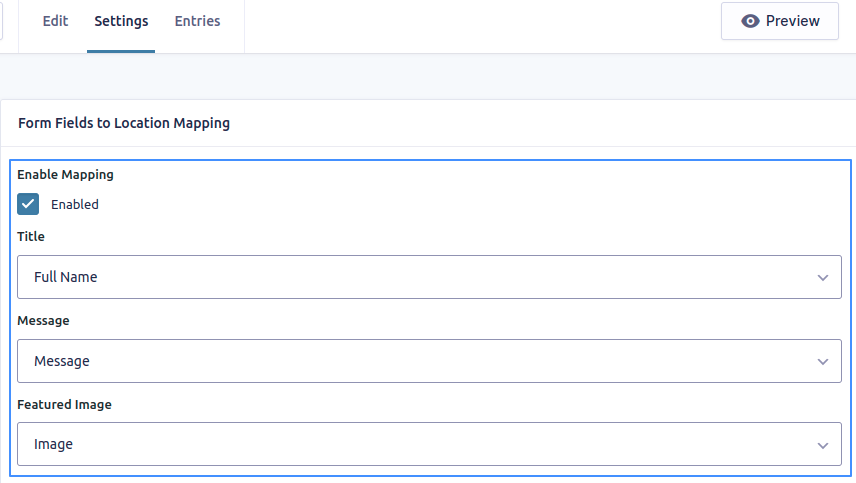
- Step 5: In Location Mapping setting page, please enable the checkbox of Enable Mapping & also select from fields dropdown connect with corresponding location property. Now update settings.

- Step 6: After complete mapping process, please navigate WP MAPS PRO -> Add Map or Edit Map and find the Gravity Form Submissions To Google Maps (Addon Settings) section and enable the checkbox provided.

- Step 7: Now select Gravity Form in edit map page, from given Select Gravity Form dropdown in Addon Settings to show entries on a map. Select which one gravity form you mapped & want to show entries on the map.

- Step 8: You can display Gravity Form submissions in the marker info window. You can manage info in the marker info window using placeholders. Please find the Infowindow Message for Gravity Form Entries section and edit the info window message using placeholders according to your requirement.

- Step 9: Save this edit map page settings. The shortcode generated by this map will display all the entries submitted by the gravity form on any page.
Explore the latest in WordPress
Trying to stay on top of it all? Get the best tools, resources and inspiration sent to your inbox every Wednesday.
