This website uses cookies so that we can provide you with the best user experience possible. Cookie information is stored in your browser and performs functions such as recognising you when you return to our website and helping our team to understand which sections of the website you find most interesting and useful.
WP Core Emails Pro empowers you to craft and implement custom HTML templates effortlessly. Elevate your brand with visually stunning emails that reflect your identity, seamlessly integrate into your WordPress communication flow.
Send custom email templates
-
- Access Settings
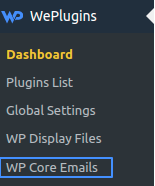
Start by clicking on the WePlugins -> WP Core Emails Pro on the navbar.
- Access Settings

- New User Registration Customization
To set up custom emails for newly registered users, follow these steps:
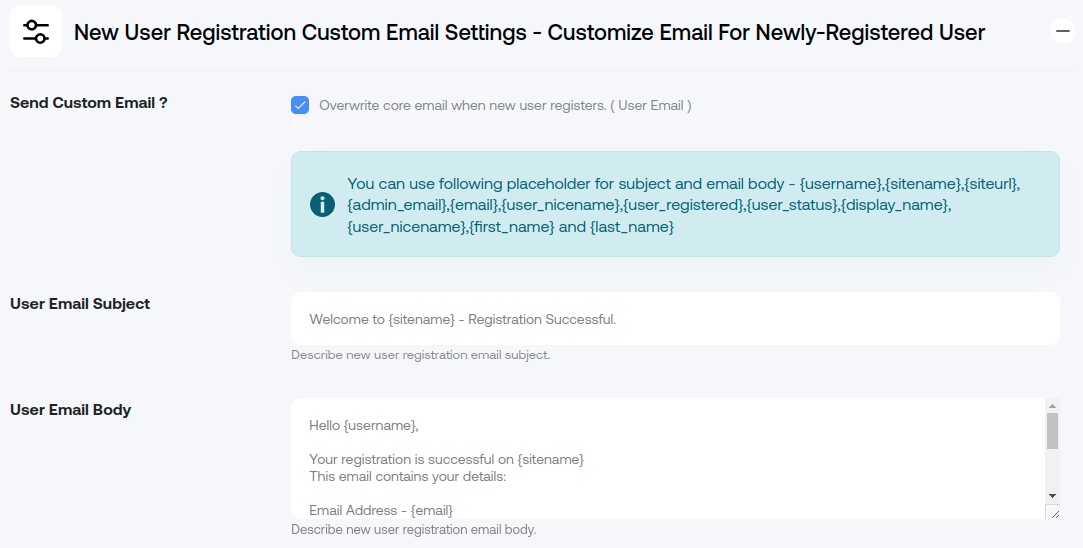
- Find the option labeled New User Registration Custom Email Settings – Customize Email For Newly-Registered User.
- Enable the setting titled Send Custom Email ?. This will allow you to replace the default system-generated emails with custom ones.
- Update Content
If you wish to modify the default content, follow these steps:
- User Email Subject You can add your user email subject for new user registration.
- User Email Body You can add your user email body for new user registration.
- Edit the text within the provided editor, customizing it to meet your preferences. You can include variables or personalize the content as needed.
- Ensure the message is clear, concise, and relevant to the purpose of the email.
- Review your changes carefully before saving.

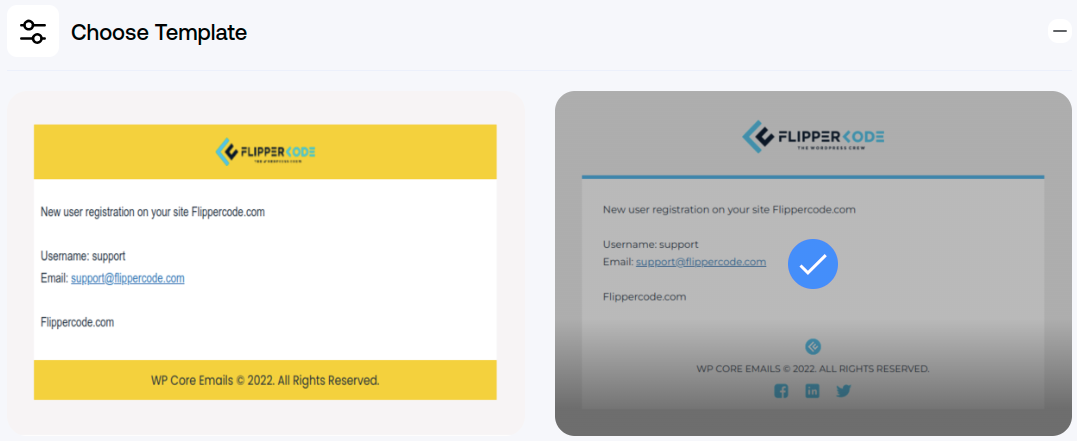
Choose Template
- Choose custom email templates tailored to your preferences.

Custom Email Template Settings & Preview
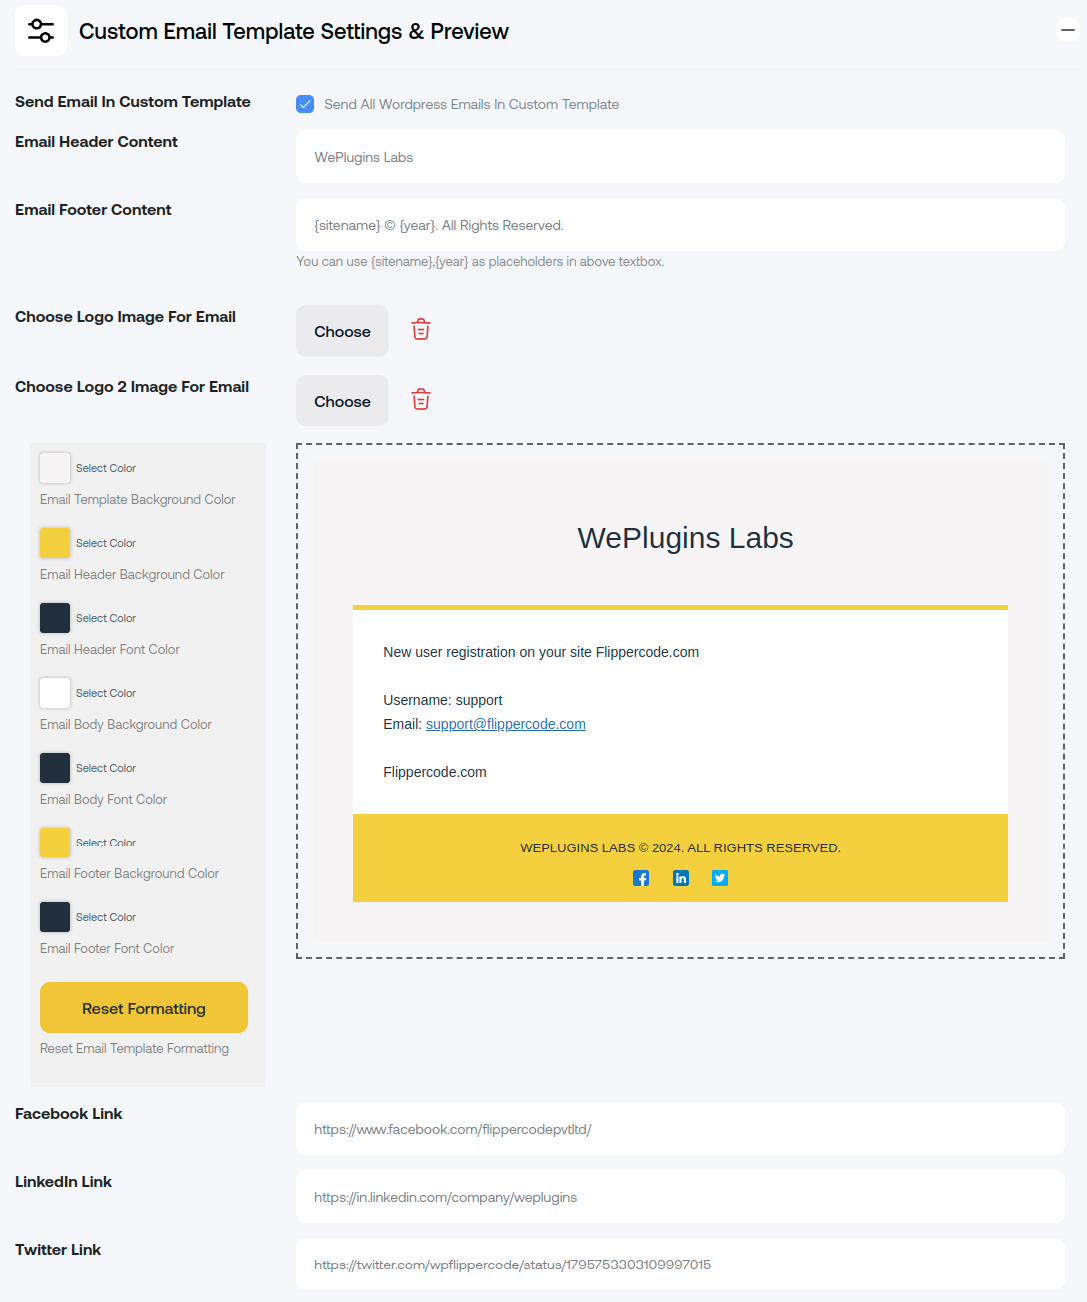
- Custom Email Template Settings & Preview:
This section allows users to configure and preview their email templates in real time. Users can ensure their email design matches their brand identity and view how it looks before sending. - Send Email in Custom Template:
Enable this option to send specific WordPress emails using the custom template. This setting allows individual control over which emails are customized. - Send All WordPress Emails in Custom Template:
When enabled, this setting ensures that all WordPress-generated emails are sent using the selected custom template, ensuring consistency across all notifications. - Email Header & Footer Content:
Customize the content for both the header and footer of your emails. This is ideal for adding personalized messages, branding elements, or important information such as disclaimers and contact details. - Choose Logo Image for Email:
Upload a logo image to be displayed in the email header to maintain your brand identity in every email you send. - Email Template Color Settings:
Customize the colors of various elements in your email, including the background, header, body, and footer, along with font colors, to ensure a cohesive, branded look. - Social Media Links:
Add clickable links to your social media profiles, including Facebook, LinkedIn, and Twitter, in the email footer to increase engagement and grow your social media presence.

- Save changes
Finally, click on Save settings to save your changes.
Explore the latest in WordPress
Trying to stay on top of it all? Get the best tools, resources and inspiration sent to your inbox every Wednesday.
