This website uses cookies so that we can provide you with the best user experience possible. Cookie information is stored in your browser and performs functions such as recognising you when you return to our website and helping our team to understand which sections of the website you find most interesting and useful.
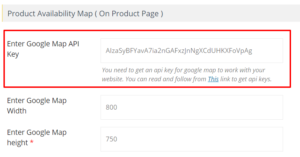
WOOCOMMERCE DELIVERY AREA PRO requires the usage of the Google Map API key to display your Store locations on map.
Please follow these steps to get a Google Map API key.
Step 1: Please sign in with your Google API Console using your Gmail account details.
Step 2: Go to the Google Developers Console. The first screen you will see in the Google API Console allows you to choose between creating a new project or using an existing one. Click ‘Continue’ after you made a selection.
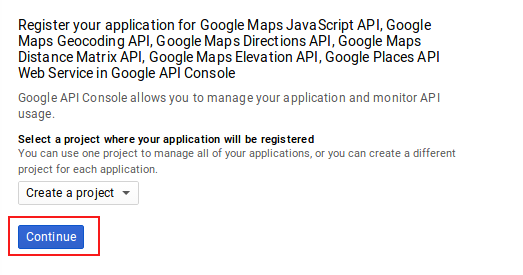
Note : Your all needed API’s are automatically enabled via this URL https://bit.ly/29Rlmfc you dont need to enable all of them individually.
- Google Maps Directions API
- Google Maps Distance Matrix API
- Google Maps Elevation API
- Google Maps Geocoding API
- Google Maps JavaScript API
- Google Places API Web Service
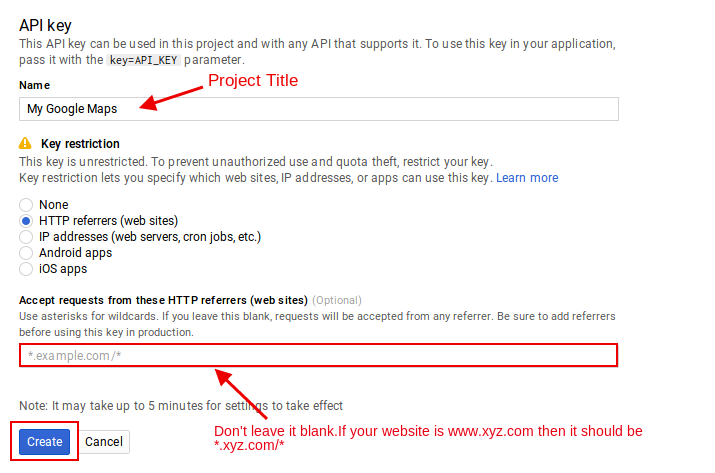
Step 3 On next page, enter your project name and HTTP referrer. If you leave the referrer field empty, then it’s possible for other users to use your key on their domains. More information see the guide Google Map Api Key
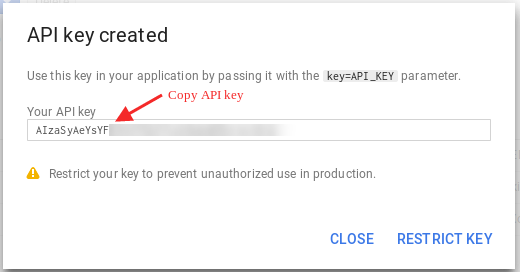
Step 4 Copy your generated API key.
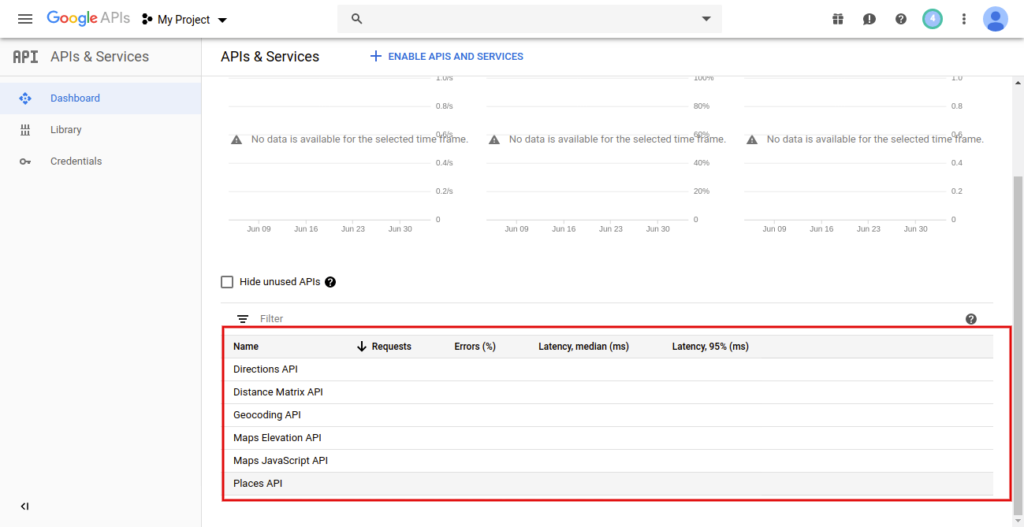
You can also see the enabled API’s at the dashboard menu.
Step 5 Then Go to Woocommerce Delivery Area Pro -> Plugin Settings page and paste your google maps API Key and save.
Now you have to attach the billing account to the project where you have created an API key.
Billing Account Attachment Method
You can use the Google Cloud Platform Console to manage your Google Cloud Platform billing account. From the console, you can update account settings such as payment methods
Some Google APIs charge for usage after crossing the limit, and you need to enable billing before you can start using these APIs. If you enable billing for a project, then every billable API in that project is billed, based on the project’s usage.
Note: Google Maps API provides you 200$ credits every month free of cost. If you are using more than 200$ per month then you have to pay as per the use.
Now need to attach billing account to the New /Existing Project :
Step 1 API is already created that mean you are already logged in to the account. If you are signout then go to the Google Cloud Platform console and sign in and select the project where you want to attach the billing account .
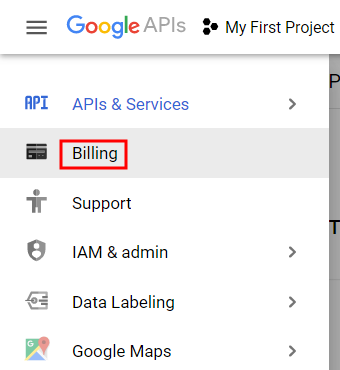
Step 2 Open the console left side menu and select Billing
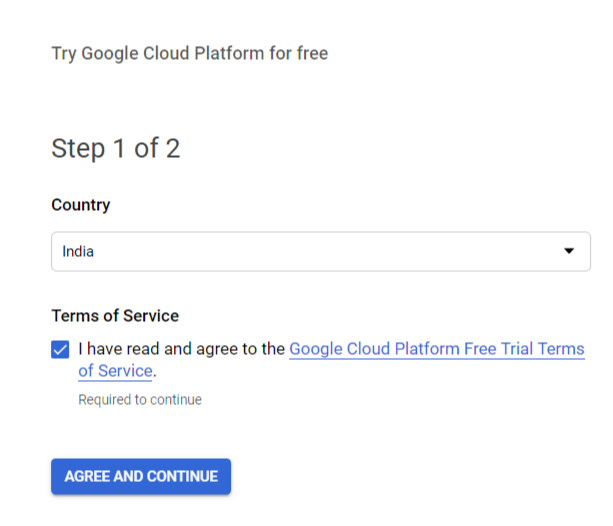
You can Try Google Cloud Platform for a free trial to accept the terms of services
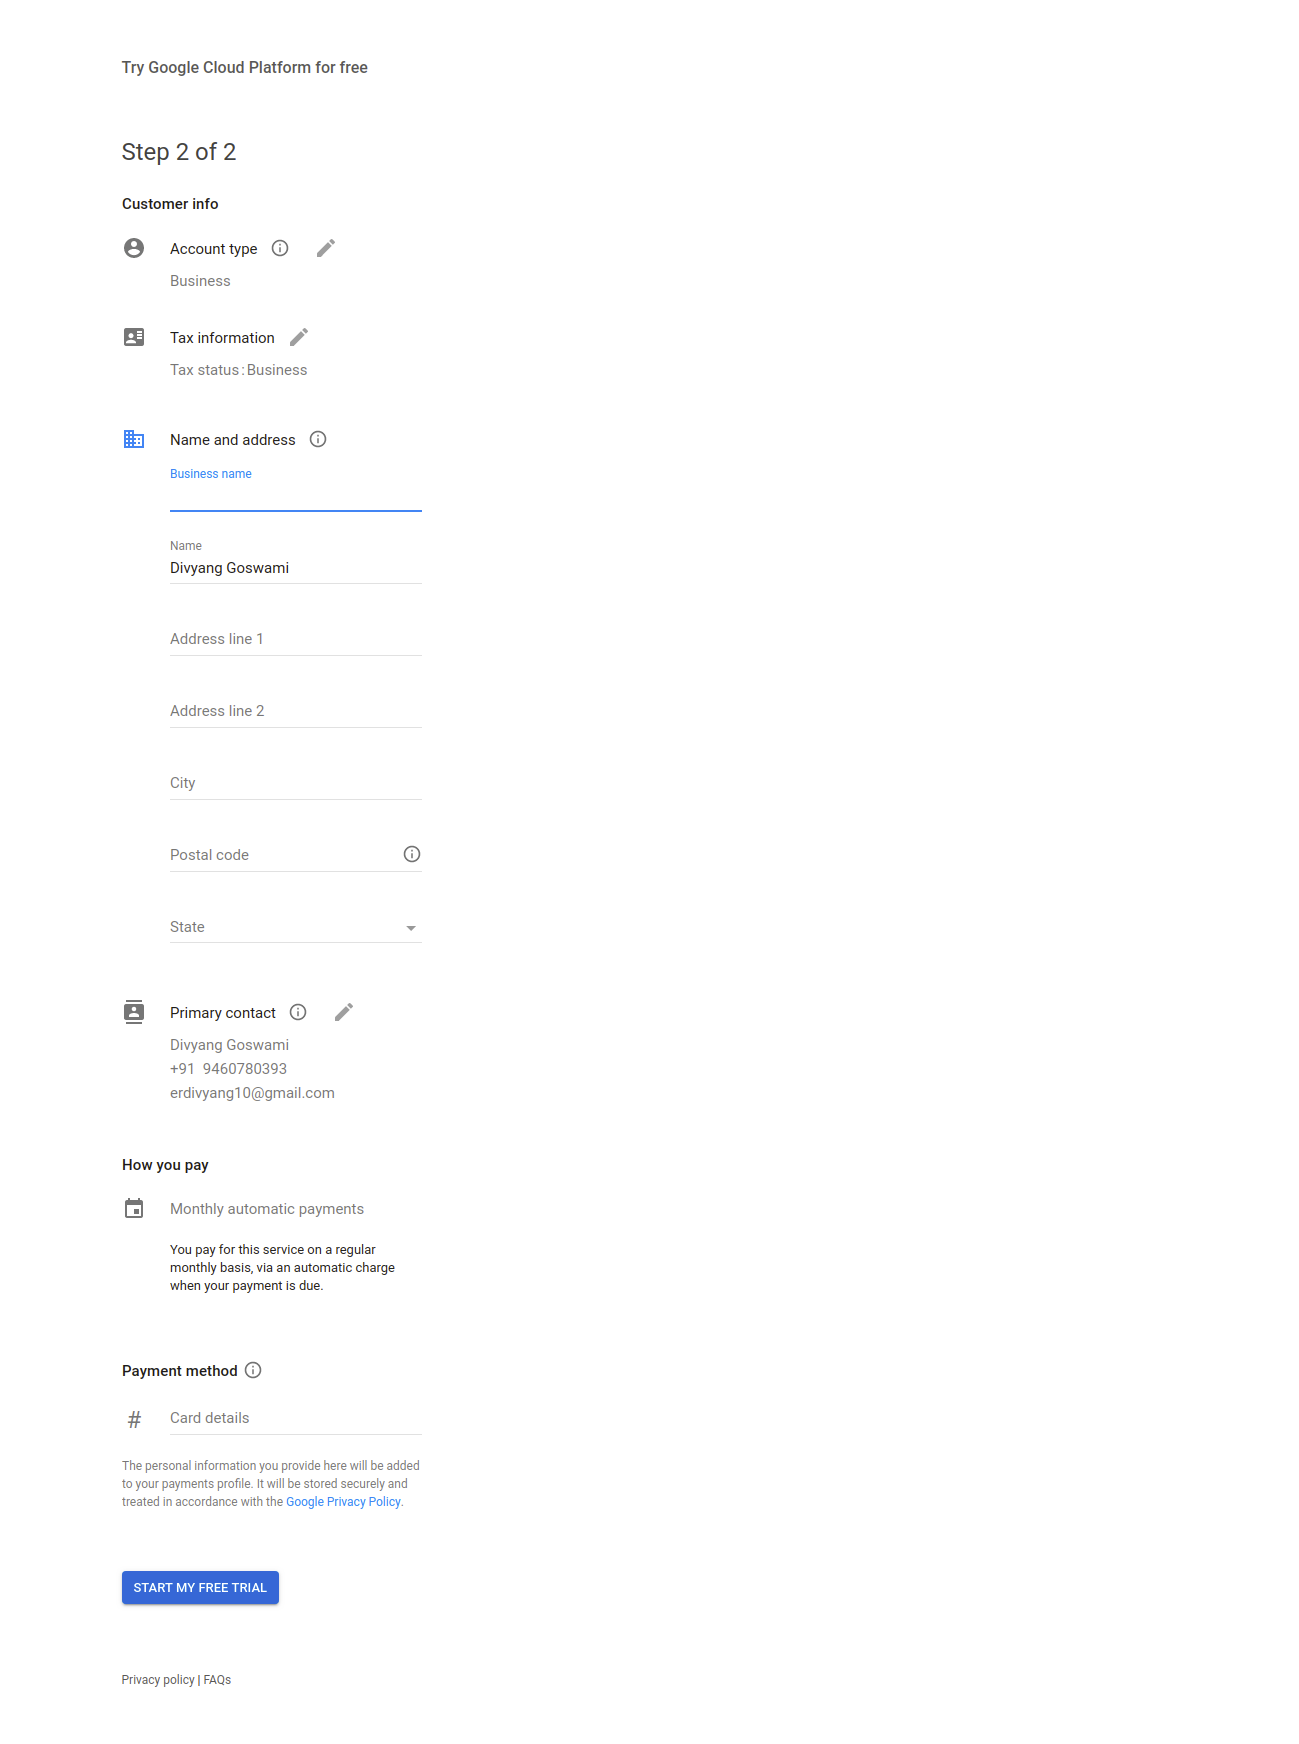
Step 3 Click the New billing account button.(note first you need to open the billing account list by clicking the name of your existing billing account near the top of the page, and then click Manage billing account).
Step 4 Enter the name of the billing account and enter your billing information. The option you see depend on your billing address.
Step 5 Click Submit and Enable billing.
Explore the latest in WordPress
Trying to stay on top of it all? Get the best tools, resources and inspiration sent to your inbox every Wednesday.
