In this step-by-step guide, I’ll show you how to add a store locator in WordPress and WooCommerce using the powerful WC Store Locator plugin. The best part? Everything takes less than ten minutes from start to finish.
Embedding a map along with directions to your stores’ physical locations needn’t be complicated. It should be straightforward to set up and manage even if your store managers aren’t tech-savvy.
If you’re looking to add a store locator to WooCommerce, this article is for you. Here, I’ll walk you through the steps to integrate Google Maps and list your store’s physical locations on your site using WC Store Locator, the best store locator plugin for WooCommerce.
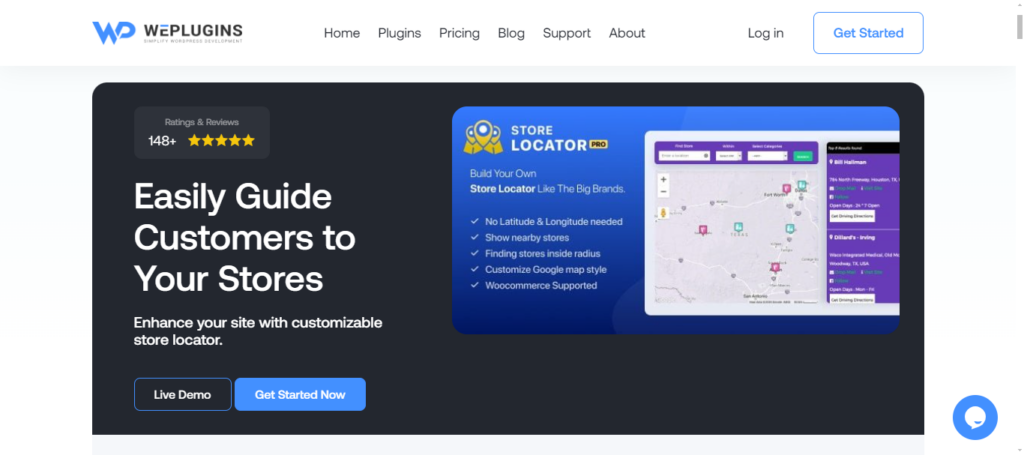
An overview of the best WooCommerce store locator plugin
WC Store Locator is an easy-to-use plugin that seamlessly integrates the store locator functionality into WordPress and WooCommerce.
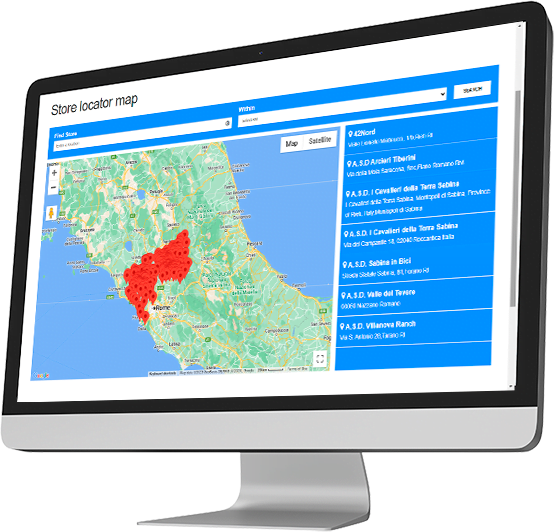
It employs real-time geocoding and location filtering to make it easy for site visitors to find stores within a specific radius of their current location without having to sift through the entire list of locations.
Plus, site visitors can use advanced filters that allow users to narrow their search based on criteria like store category or distance.
The store locator is fully responsive. Site visitors will experience a fluid and intuitive user interface no matter their device screen size.
Here’s a quick overview of WC Store Locator’s top features.
Customizable Google Maps integration: It lets you control every aspect of the embedded Google map‘s appearance — from its style and color to the zoom level and map controls. Also, you can use custom map markers to ensure your store locations stand out even more.
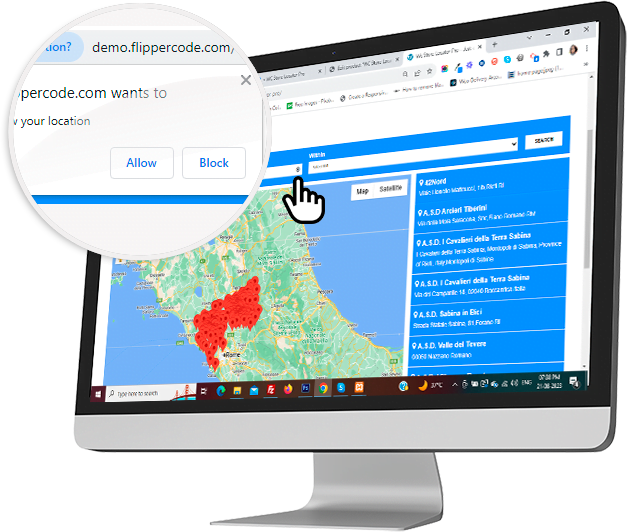
Radius-based search: This WooCommerce store locator plugin uses geocoding technology to detect users’ locations and automatically show them nearby stores. This is particularly useful for businesses that operate in multiple regions or countries because site visitors won’t need to manually search for stores — they will be automatically presented with relevant options based on their current location.
CSV store import: Site admins can use the CSV import feature to upload multiple stores in bulk without needing to enter their longitudes and latitudes. This is handy for stores with multiple locations.
Customizable info windows: You can add info windows to show operating hours, contact details, and special offers for each store. Pop-up info windows make the user experience more engaging and give site visitors important information right from the map, without them having to navigate to another page.
Deep WooCommerce integration: This WooCommerce store locator plugin ties store locations directly to product detail pages and shows customers which physical stores stock the products they are viewing online. This increases the percentage of shoppers who go from browsing online to purchasing in-store.
How do I add a store locator in WordPress and WooCommerce?
In this section, I’ll outline the steps to add the store locator functionality to your website using WC Store Locator.
Visual learner? Check out this video detailing the setup steps. Otherwise, read on for written instructions to set up the WooCommerce store locator plugin.
Step 1: Add each store location in WordPress
Buy a WePlugins membership plan.
Head into your website’s admin area and add the WePlugins core plugin to your WordPress website.
Navigate to WePlugins → Plugins List. Run a search for “WC Store Locator” and hit “Download Now” followed by “Activate”.
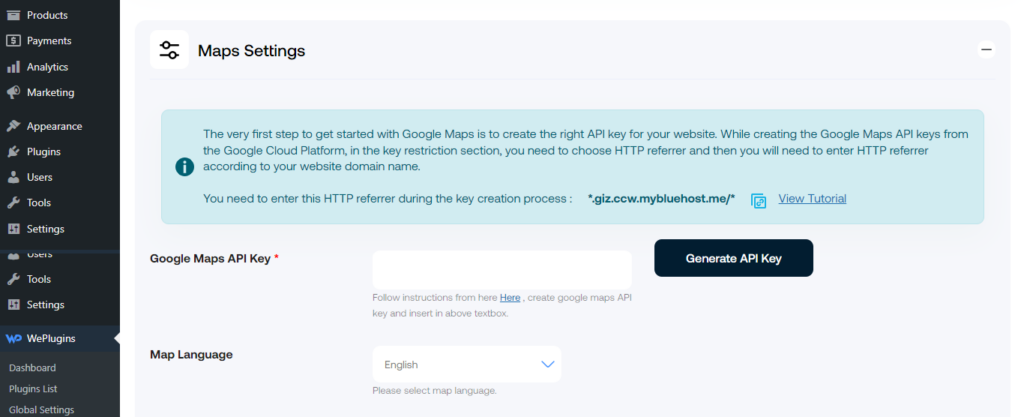
Go to the newly added WePlugins → WC Store Locator.
Open the “Maps settings” accordion and enter the Google Maps API key in the appropriate field. Note: Follow this guide to get the Google Maps API key.
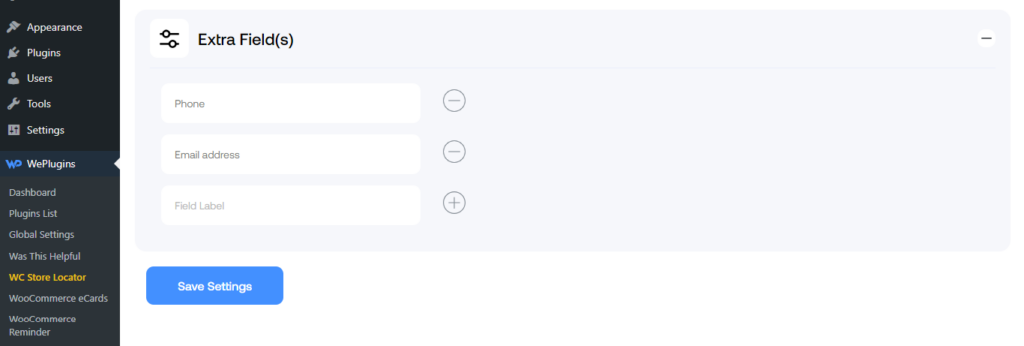
Next, scroll to the “Extra Field(s)” section at the bottom of the page. Here, you can create new fields to showcase additional information like contact email, phone number, etc. for each store location.
Hit “Save Settings”.
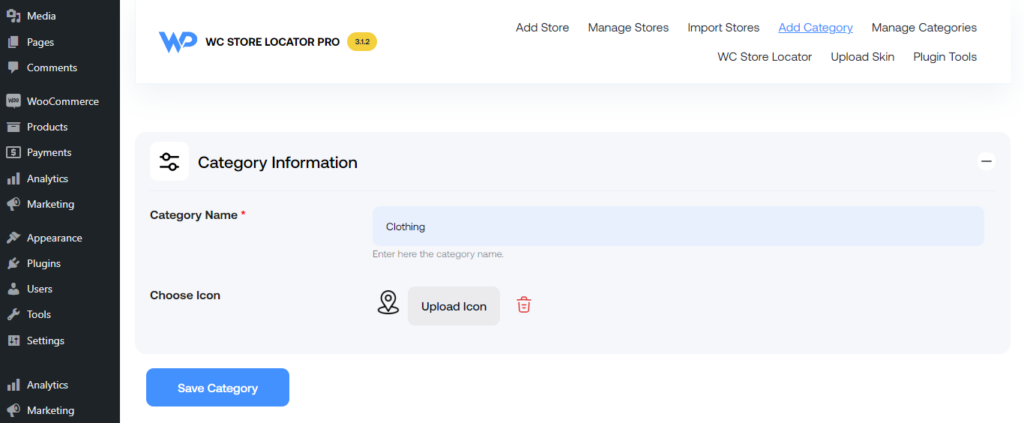
Next, select “Add Category” from the menu at the top of the page.
Enter a name for the store category, upload an icon, and then hit “Save Category”. You can create as many categories as needed for each type of store location.
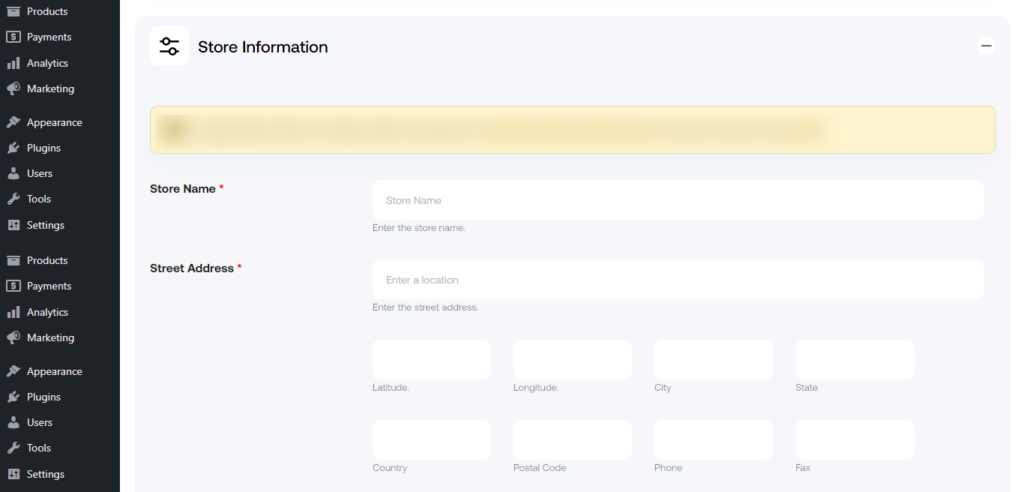
Now, it’s time to add stores to each location. Select “Add Store” from the menu at the top of the page.
From here, you can add details for each store location: store name, address, logo, description, and the extra fields you created earlier.
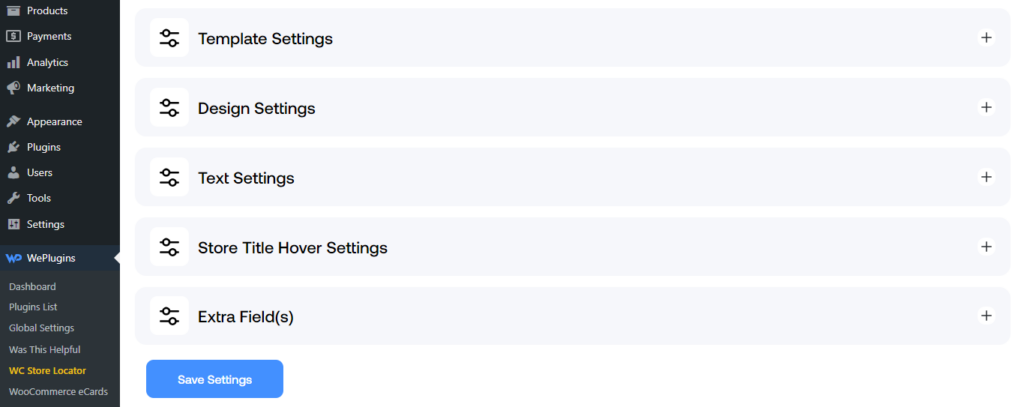
Step 2: Customize the map and store locator
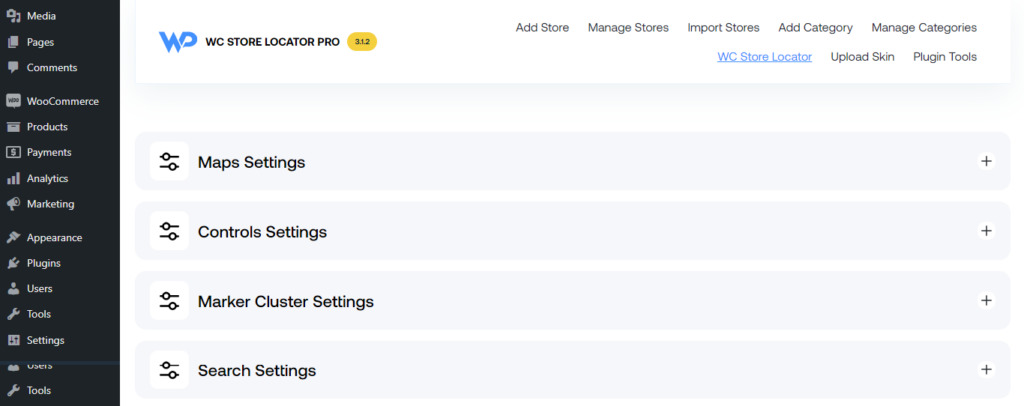
Head into your site’s admin and go to WePlugins → WC Store Locator. Then configure the options as appropriate:
Maps settings: Here, you can choose the maps’ default language, height and width, zoom level, animation, update the center latitude and longitude, and more.
Controls settings: These options dictate how site visitors can interact with the map on the WordPress store locator page. You can disable full-screen control to prevent site visitors from toggling the map in and out of full-screen mode, disable zoom control to prevent users from zooming the map in or out, disable the map type control to prevent site visitors from toggling between different map types, and more.
Marker cluster: This lets you group markers on a map into clusters to make it easier for site visitors to navigate and understand.
Search: You can update the search radius to define the maps’ boundaries and specify the measurement unit.
Circle: This lets you enable a circle around store locations with filter markers.
Info window: Add placeholders to be shown in the info popup window that displays information about a location on the map.
Stores List: Here, you can add placeholders for when site visitors hover over the list of stores, choose to show the total number of stores, and specify the listing sort order.
Store Locator Template: Pick from a range of options for the store locator template.
Template Settings: Here, you can customize the content shown on the WooCommerce store locator page when it first loads, including whether or not to show the nearest stores, loader color, etc.
Design Settings: This lets you add custom CSS and adjust the base font size and color scheme.
Text Settings: Modify the store name, category filter, and no result found text.
Store Title Hover Settings: You can enable Zoom when users hover over the title.
Extra fields: Additional fields to display useful information such as phone number, store managers’ name, contact email, etc. for each store location.
Hit “Save Settings” once done.
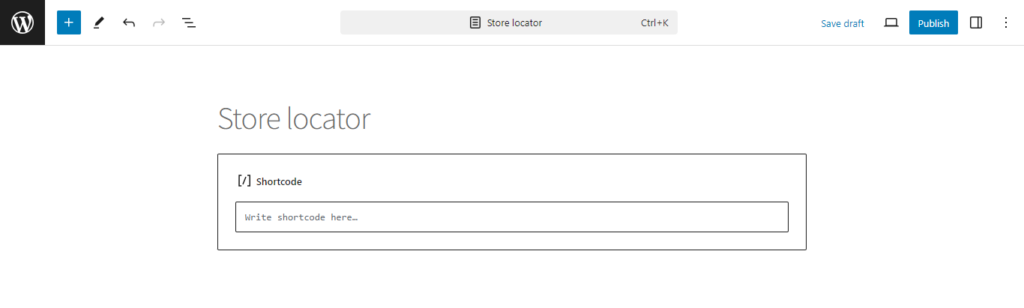
Step 3: Add the store locator to the front end
Go to Pages → Add New Page in your site’s admin menu.
Name the WooCommerce store locator page as appropriate and paste the shortcode in the description section of the screen.
Hit “Publish”.
Ready to set up the best WooCommerce store locator plugin?
That’s it. You’ve successfully embedded Google Maps along with your stores’ locations onto your website.
With this up and running, your customers will be able to quickly and easily find your store’s physical locations.
WC Store Locator is the best WooCommerce store locator plugin. It deeply integrates with Google Maps and WooCommerce integrations and offers radius-based search, store import, customizable info windows, and more.
This website uses cookies so that we can provide you with the best user experience possible. Cookie information is stored in your browser and performs functions such as recognising you when you return to our website and helping our team to understand which sections of the website you find most interesting and useful.
Strictly Necessary Cookies
Strictly Necessary Cookie should be enabled at all times so that we can save your preferences for cookie settings.
If you disable this cookie, we will not be able to save your preferences. This means that every time you visit this website you will need to enable or disable cookies again.
3rd Party Cookies
This website uses Google Analytics to collect anonymous information such as the number of visitors to the site, and the most popular pages.
Keeping this cookie enabled helps us to improve our website.
Please enable Strictly Necessary Cookies first so that we can save your preferences!


")