Searching for a WordPress plugin to list files in a directory on your website? In this tutorial, I’ll show you how to use the powerful WP Display Files plugin to showcase files hosted on your site.
The best part? The entire process takes less than ten minutes from start to finish.
An overview of the best WordPress file directory plugin
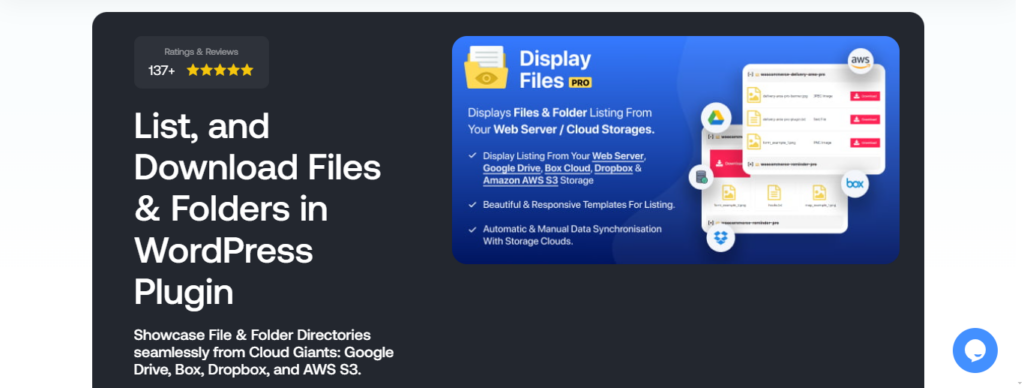
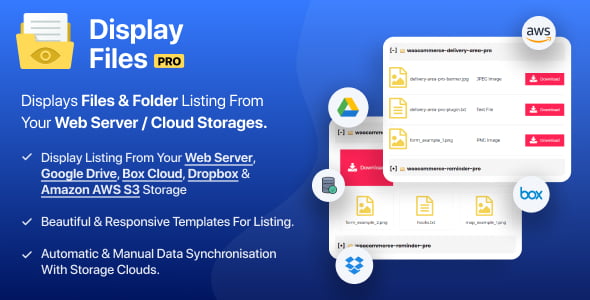
WP Display Files is a robust plugin that lets you display file and folder listings from various sources directly on your WordPress website using shortcodes. You can display files from custom directories on your web server, as well as from external cloud storage platforms like Google Drive, Dropbox, Box Cloud, and Amazon S3.
The WP Display Files plugin is perfect for a wide array of use cases — membership sites, intranets, or client portals. It is super easy to use, and it automatically syncs with your storage data and reflects updates in real time.
Below, we’ll unpack the top features that make WP Display Files the best WordPress plugin to list files in a directory.
Multiple data source integrations: It allows you to showcase files not only from your website’s server but also from several third-party cloud platforms, such as Dropbox, Google Drive, Amazon S3, and Box Cloud.
Flexible file layout options: Some files are best displayed along with detailed file names and metadata, while others (like media files) are best suited to a more visual layout. With WP Display Files, you can present files in two beautiful, functional layouts: lists and grids.
Readymade templates: It comes with 6 pre-built light mode and dark mode templates or themes that you can choose from to adapt how the files are displayed on your site — no custom code needed.
User access control: This WordPress file directory plugin has built-in robust access control features that allow file restrictions based on user roles (e.g., admin, editor, subscriber, guest, etc.). This ensures that only authorized users can view files or download them from your file library.
Advanced search and pagination: Sites that list hundreds or thousands of files and folders will appreciate WP Display Files’ pagination and powerful search capabilities that make finding files and navigating through the library much easier.
File previews: The file preview feature enables visitors to view image files without needing to download them first. This goes a long way towards enhancing the user experience.
How to use a WordPress plugin to list files in a directory
Here, I’ll show you how to WP Display files to showcase files in a grid or list layout on your WordPress website.
Visual learner? Check out this video detailing the setup steps. Otherwise, read on for written instructions to set up the WordPress file directory plugin.
Step 1: Add the WP Display files plugin to your site
Step 2: Configure the essential settings of the WordPress file directory plugin
Navigate to the newly added WePlugins → WP Display Files area in your site’s admin.
Select “Create Shortcode” from the menu at the top of the screen.
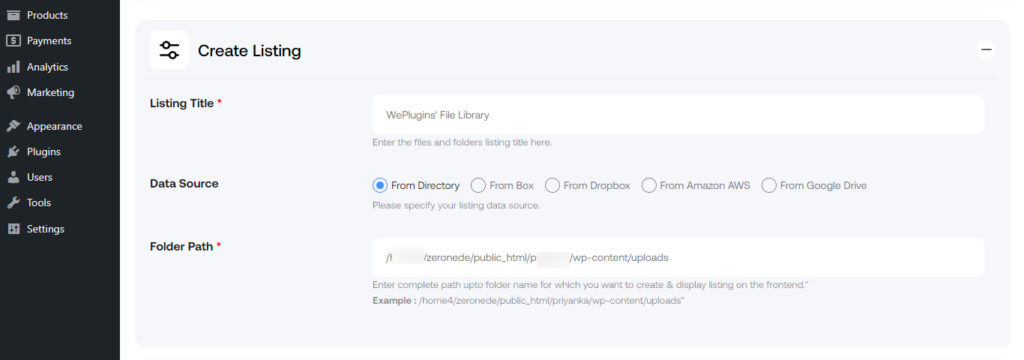
Open the “Create Listing” accordion, and enter the name for the collection of files or folders.
Select the appropriate source where the files you wish to display are hosted. For this tutorial, I want to list files hosted in a directory on my WordPress site so I’ll select “From Directory” here.
Next, enter the path where the files and folders you wish to showcase on the front end are hosted.
The “Include / Exclude Specific Files & Folders” section lets you choose the files and folders to be included or excluded from the file library. Enter their names followed by commas.
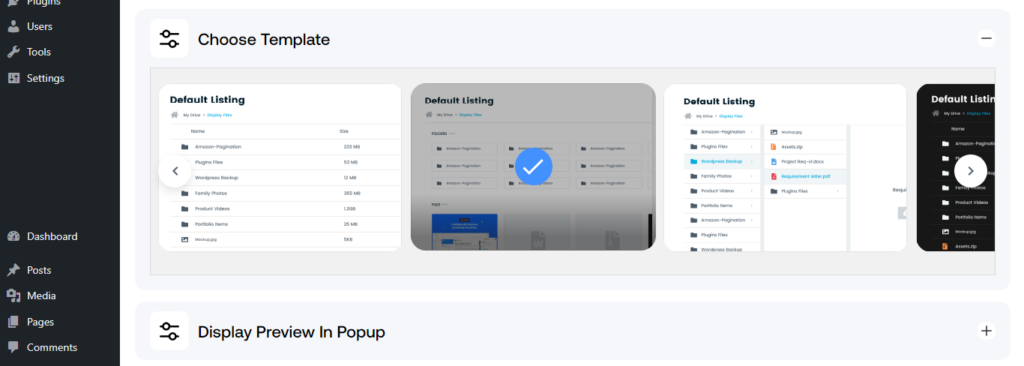
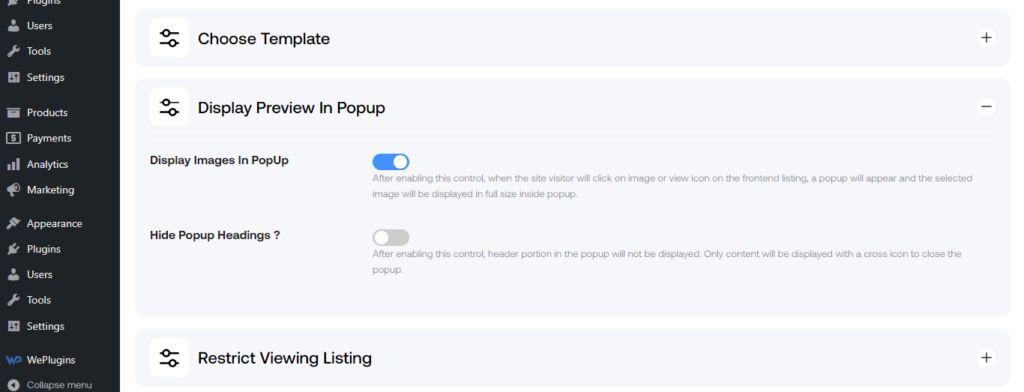
Choose the theme template that dictates how the file library will look on the front end.
If you plan to showcase images in the file library, it’s a good idea to allow site visitors to preview them before downloading. Toggle on the “Display Images In Popup” option to enable image previews.
Enabling “Hide Popup Headings” prevents the header portion from being visible when users select the pop-up.
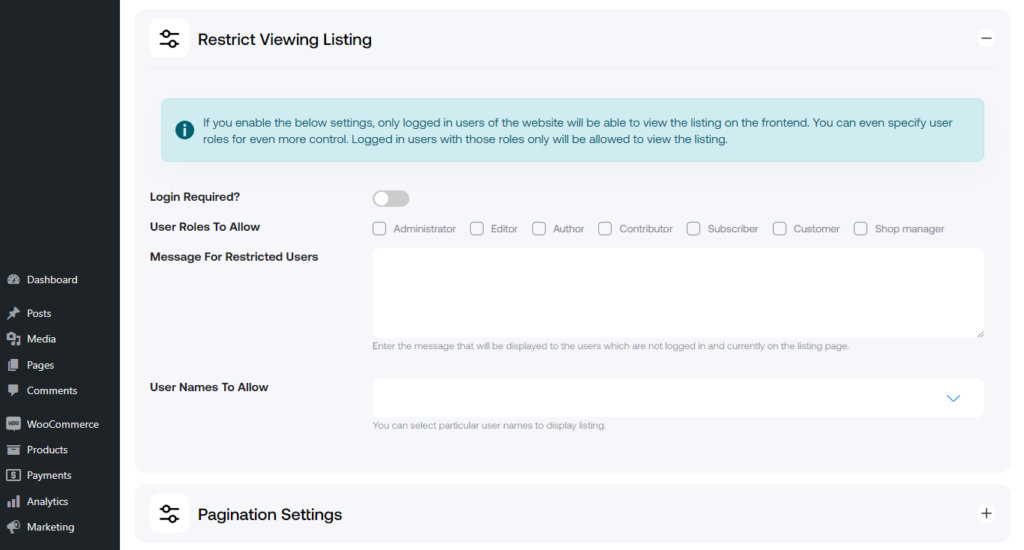
The “Restrict Viewing Listing” section includes a collection of settings to configure user access control to the file library. Here’s an overview of the options:
Enable only logged-in viewers to see the file library.
Choose which user roles are allowed to view the folder library.
Add a custom notification to be shown to users who lack the necessary permissions to access the file library.
Define specific users that can access the file and folder library.
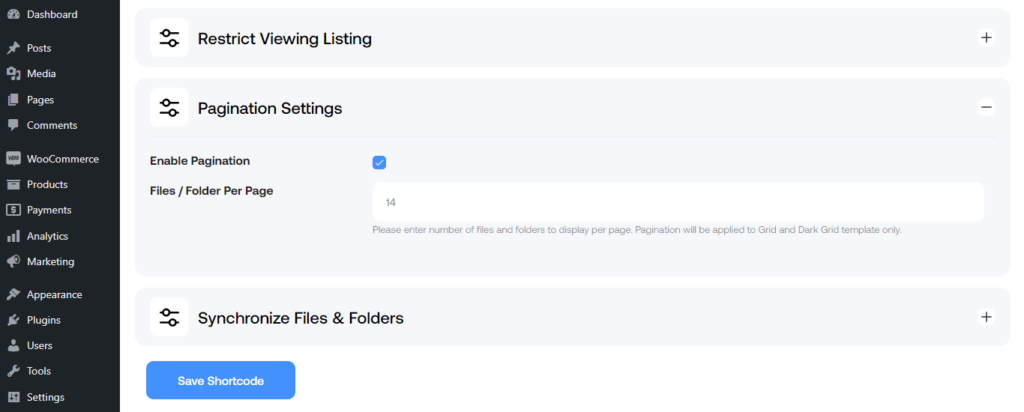
The “Pagination Settings” section lets you decide whether to show the file library’s contents across multiple pages. You can also specify how many files and folders can be shown on each page. Note that pagination is only available on Grid and Dark Grid templates.
Ticking the “Synchronize Files & Folders” option will ensure that new files and folders are scanned and updated on cloud storage.
Finally, hit “Save Shortcode” at the bottom of the screen.
Step 3: Set advanced settings for the WordPress file directory plugin
From the WePlugins → WP Display Files area in your site’s admin, select “WP Display Files” from the menu at the top of the screen.
Specify how often you wish to sync files between their storage location and the file library in the “Cron Job Settings” section.
Add custom CSS to the “Appearance Settings” section to customize how the file library looks on the front end.
In the “Frontend Message Settings”, you can add custom text to be shown in the “Search box placeholder” and “No result message” sections of the file library.
Hit “Save Settings” once done.
Step 4: Add the file library to a page
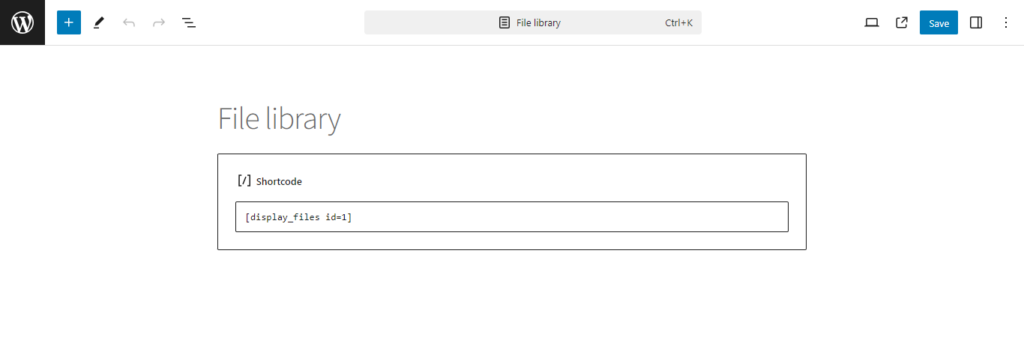
Create a new page or open an existing one to which you want to add the file library.
Update the page title as appropriate — something simple like “File Library” works fine.
Head to WePlugins → WP Display Files in your site’s admin, and select “Manage shortcodes” from the menu at the top of the screen.
Copy the shortcode for the specific file library you wish to showcase.
Then head back to the “Edit” page, paste the shortcode you just copied, and hit “Publish” or “Update”.
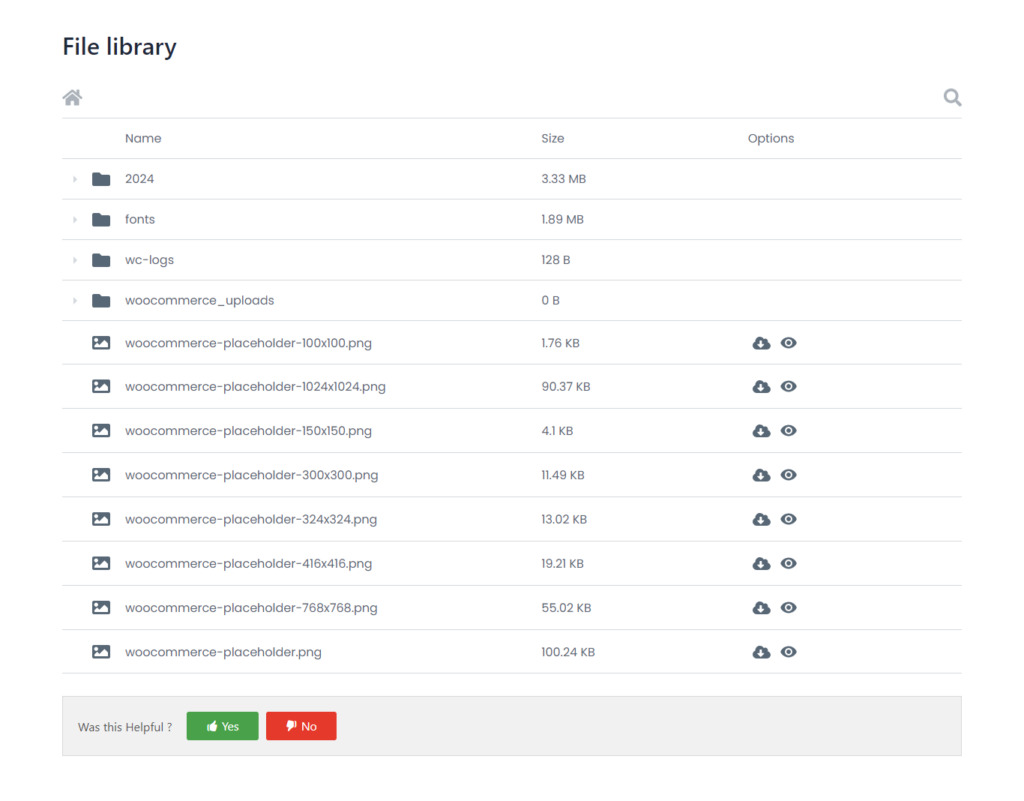
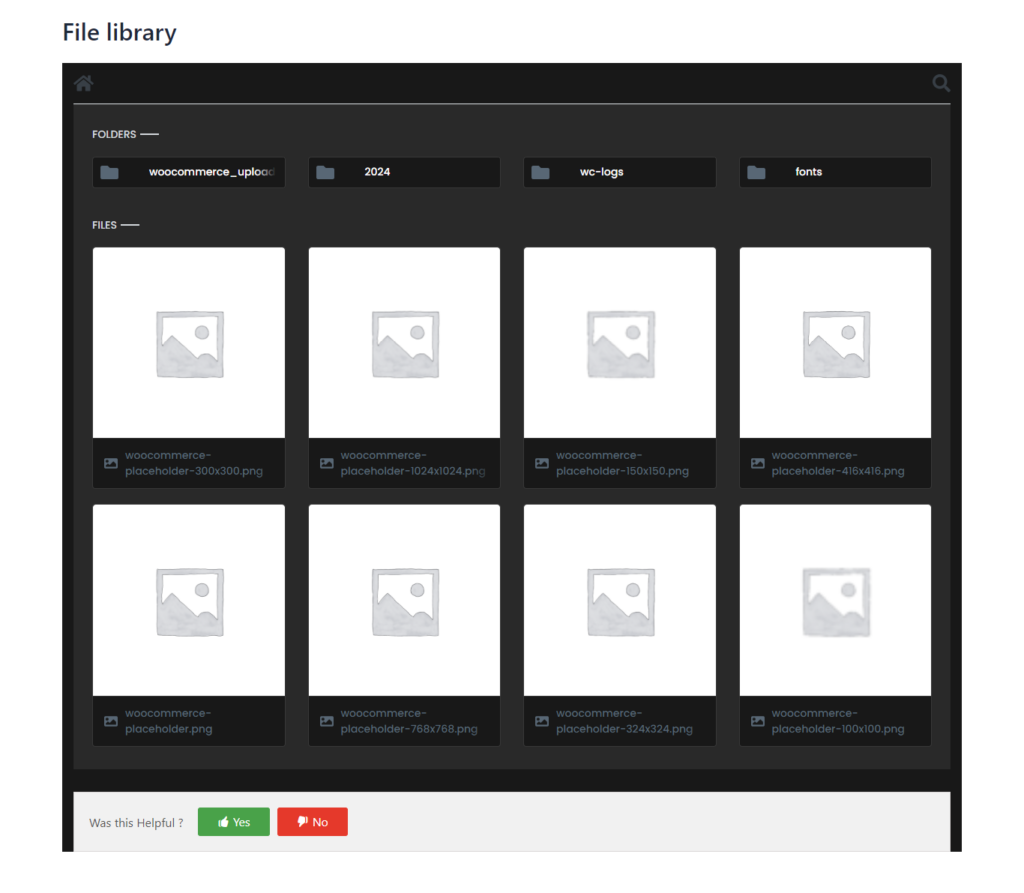
That’s about it. Go to the front end to view the file library. It’ll look something like this:
That’s how to use a WordPress plugin to list files in a directory!
In this post, I’ve shown you how to use WP Display Files, the best WordPress file directory plugin to list files in a directory on your website.
Get WP Display Files and create a robust searchable file library in minutes!
This website uses cookies so that we can provide you with the best user experience possible. Cookie information is stored in your browser and performs functions such as recognising you when you return to our website and helping our team to understand which sections of the website you find most interesting and useful.
Strictly Necessary Cookies
Strictly Necessary Cookie should be enabled at all times so that we can save your preferences for cookie settings.
If you disable this cookie, we will not be able to save your preferences. This means that every time you visit this website you will need to enable or disable cookies again.
3rd Party Cookies
This website uses Google Analytics to collect anonymous information such as the number of visitors to the site, and the most popular pages.
Keeping this cookie enabled helps us to improve our website.
Please enable Strictly Necessary Cookies first so that we can save your preferences!


")
")