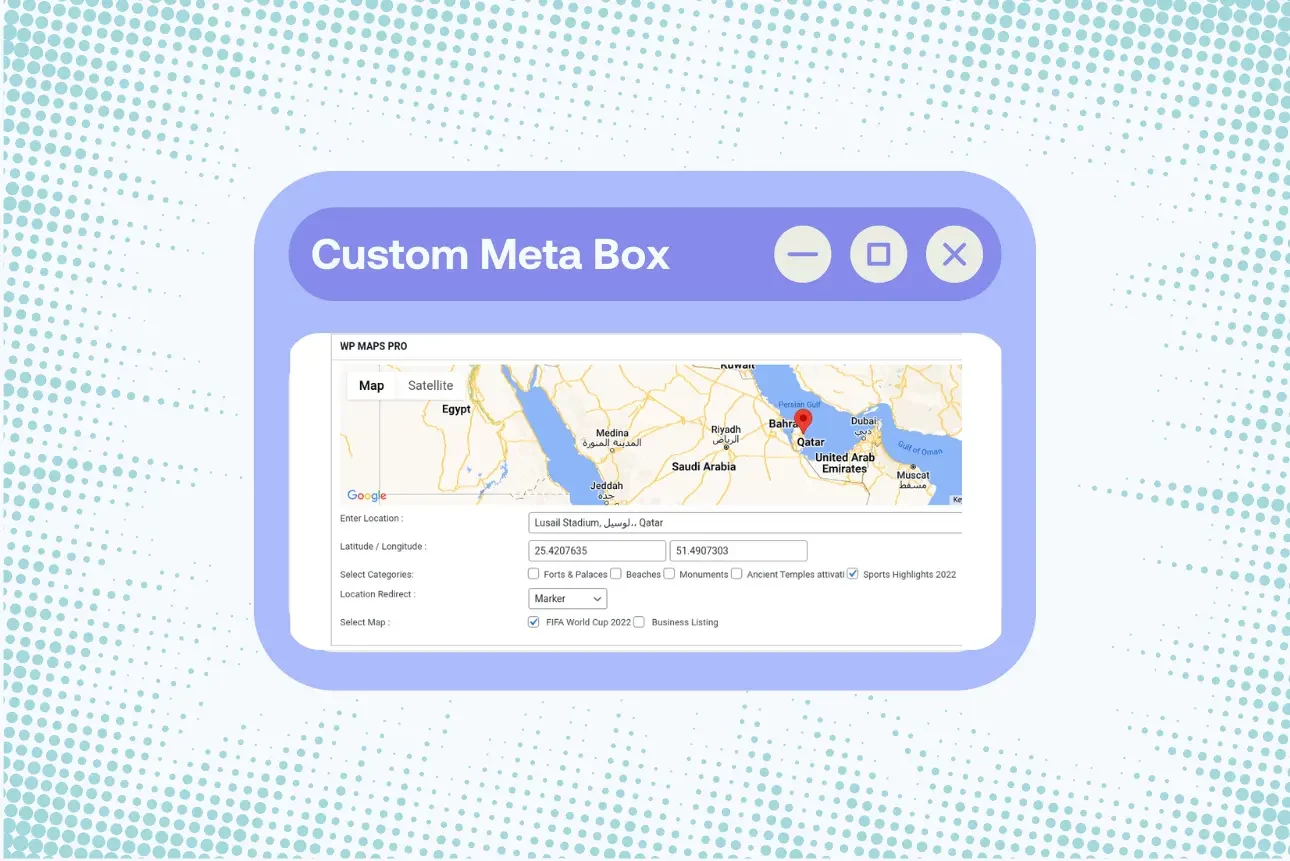
This blog aims to provide the needed knowledge for developing or creating a custom META BOX using WordPress block development.
We will be delving into the entirety of meta box usage, features, and how it is created, registered, and saved.
META BOX: In general, the meta box allows for the inclusion of additional information related to the content being created and edited.
IMPORTANCE OF CUSTOM META BOX
The custom meta box can also be used for various purposes from simple text input to complex configuration settings. And here is why it is important.
- It stores additional information relating to a post.
- It allows you to enter metadata that is SEO optimized.
- Addition of custom tags or categories for a particular type of post.
- It can also manage RSVP.
- It enhances content management.
- Custom meta boxes can be used to extend the functionality of themes and plugins thereby allowing developers to create more dynamic websites rich with various features.
- It is used in extending users’ information, and lots more
WHAT IS BLOCK DEVELOPMENT AND WHAT ARE THEIR BENEFITS TO WEBSITES
BLOCK DEVELOPMENT: this is the process of creating custom blocks for the Gutenberg editor. It allows users to create custom blocks to provide unique functionalities that are not available with the default blocks.
ADVANTAGES OF BLOCK in WORDPRESS
- The usage of blocks allows for consistent design and functionality across different posts and pages.
- It also allows for reusable blocks that can be saved.
- Block development is very flexible in customization.
- The modular nature of the block allows for the combination of various types of content blocks.
- Blocks can be integrated seamlessly with different types of themes and plugins.
The advantage of Block development is not limited to the above, it enhances user experience with engaging, interactive features that integrate smoothly with various functionalities that promote a cohesive design.
For a deeper understanding of blocks in WordPress and the different types of blocks available, refer to these comprehensive guides.
WhAT IS A META BOX
They are the interface that is found in WordPress custom fields that allow you to add additional information or metadata to posts and pages.
They appear in the WordPress admin area, normally below the content editor. It provides the interface for inputting, editing, and saving this additional data.
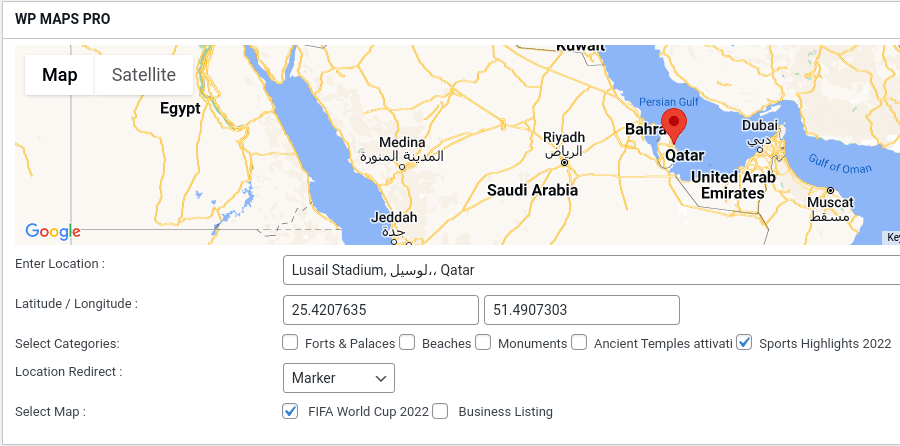
Here is what a typical custom meta box looks like.

They enhance the flexibility and functionality of the WordPress content management system by enabling the storage and display of various types of data.
WHAT IS THE PURPOSE OF META BOX
The purpose of META BOX in general, is to allow users the advantage of adding and managing additional metadata or custom fields for posts and pages for the enhancement of content management flexibility and the creation of a more suitable functional website.
Here are some examples of metadata usage in WordPress.

The most popular WordPress map plugin uses a custom meta box to collect location details, allowing them to be assigned to posts.
WHAT ARE THE DIFFERENCES BETWEEN CLASSICAL META BOX AND BLOCK-BASED META BOX
There is a broad difference between classical also known as the traditional meta boxes and the block-based meta boxes most especially in how they are being used.
Here is a tabular representation of the differences.
| S/N | PARAMETERS | CLASSICAL META BOX | BLOCK-BASED META BOX |
| 1. | IMPLEMENTATIONS | They are normally added using PHP code either in the Ina plugin or in the theme’s function. | They are created and added using JavaScript within a custom block. They are also built using react WordPress block. |
| 2. | USER INTERFACE | The interface usually simply has a field like text inputs | The interface is modern, it includes a variety of interactive media elements. |
| 3. | SAVING AND RETRIEVING DATA | Data is stored using hook-like save_post and retrieved using the get-post-meta function | Data are saved as part of the post content or as part of the post meta. It typically uses REST API to save data. |
| 4. | FLEXIBILITY | Not very flexible, most especially in terms of modern UI/UX. | It is very flexible. It has various components that house different elements. |
| 5. | DEVELOPMENT | Developing classical metabox requires adequate knowledge of PHP | Developing block-based meta boxes requires knowledge of Gutenberg, JavaScript, and React. |
| 6. | IDEAL USAGE | It is ideal to make use of the classical meta box when making a simple project. | For making a new project that adequate Gutenberg advantage is desired. |
SETTING UP YOUR DEVELOPMENT ENVIRONMENT
Conventionally, a development environment is needed when creating a meta box or any block at all.
Here are the tools and software needed.
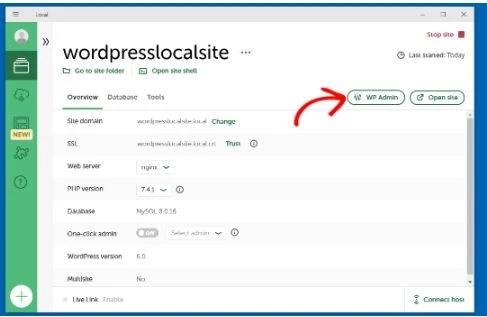
The first is a web server, this is where you develop your local environment. You can make use of WAMP, MAMP, XAMPP, or Local by Flywheel.
WordPress installation: to install WordPress, simply download the latest version from WordPress.org.
Text editor/ IDE: text editor are software app used for writing and editing code. They include sublime text, visual studio code, etc.
The node.js and npm: install the node.js from the node.js website.
Note: the npm comes with the node.js.
Having gotten the needed tools and software, the next is the setting up.
To set up, use any of the web servers, and launch the server software, then you start the web server and the database server ( Apache & MsSQL) respectively.
In the installed WordPress, extract Its archive to the web server’s database management tool and create a new database meant for the WordPress site.
The next is to configure your WordPress and this is done by opening your browser and navigating it to http://localhost/your-wordpress-folder,

after which you follow the steps for installation.
To complete the following installation, make sure you provide the correct size information and then create an account.
The next is to make use of your installed text editor and add the needed extension like JavaScript, PHP, or, WordPress plugin, then you install node.js and npm after installing, and make sure you verify.
Run this code to verify.
node-v
npm-v
The next step is to initialize npm to your WordPress theme or plugin directory and initialize the npm to create a package.json file by running this command.
npm init -y .
Then you install WordPress/script using this code.
@wordpress/script --save-dev.
After that has been done, add the following script to your block.json file.
"Script" {
"build": "wp-script"
"start": "wp-script"
Start
}
This finalizes the setting up of the local environment.
CREATING CLASSICAL META BOXES
INTRODUCTION
A classical metabox allows you to create an interface within the admin area where users can input additional needed data to a post or page.
This is the traditional way of adding meta boxes in WordPress. It is different from the modern Gutenberg editor.
Classical meta boxes offer flexibility with various input functionalities, such as text fields, checkboxes, etc.
STEP-BY-STEP GUIDE IN CREATING CLASSICAL META BOXES
After you have set up your local environment, the next thing to do is to create your box.
Here are the steps involved in creating a classical meta box using WordPress block development;
To get started, you need to create a parameter telling WordPress to run your custom function when it is ready to add meta boxes. To do this, use the add_actiofunctionon to hook into the add_meta_boxes action.
Make sure your code looks like this
add_action('add_meta_boxes', 'weplugins_add_meta_box');

// Meta box callback function
function weplugins_meta_box_callback($post) {
    wp_nonce_field('weplugins_nonce', 'weplugins_nonce');
    $value = get_post_meta($post->ID, '_weplugins_meta_value', true);

    echo '<label for="weplugins_field">Custom Field:</label>';
    echo '';
}
With this, you have successfully added your meta box.
SAVING THE CUSTOM META BOX DATA
To save the data in the meta box, you need to make use of the save_post action.
This function will run when a post is saved.
To save, use the following code.
add_action('save_post' ,'my_meta_box_save');

function my_meta_box_save(post_id) {

if(array_key_exists(‘my_meta_field’ , $_POST)) {
   update_post_meta($post_id,‘_my_meta_key’ ,sanitize_text_fields($_POST[ ‘my_meta_field’]))
}

}
Here is a code snippet for creating a classical meta box
// Add the meta box
function weplugins_add_meta_box() {
    add_meta_box('weplugins_meta_box','Custom Meta Box','weplugins_meta_box_callback','post');
}

add_action('add_meta_boxes', 'weplugins_add_meta_box');

// Meta box callback function
function weplugins_meta_box_callback($post) {
    wp_nonce_field('weplugins_nonce', 'weplugins_nonce');
    $value = get_post_meta($post->ID, '_weplugins_meta_value', true);

    echo '<label for="weplugins_field">Custom Field:</label>';
    echo '';
}

// Save data
function weplugins_save_meta_box_data($post_id) {
    if (!isset($_POST['weplugins_nonce']) || !wp_verify_nonce($_POST['weplugins_nonce'], 'weplugins_nonce')) {
        return;
    }
    if (!current_user_can('edit_post', $post_id)) {
        return;
    }
    if (isset($_POST['weplugins_field'])) {
        update_post_meta($post_id, '_weplugins_meta_value', sanitize_text_field($_POST['weplugins_field']));
    }
}
add_action('save_post', 'weplugins_save_meta_box_data');
CREATING A CUSTOM META BOX USING BLOCK DEVELOPMENT
The creation of a custom meta box using block development involves a series of steps they include.
- Setting your local environment
- Creating a plugin directory and a plugin file
- Registering the meta block
- Writing the JavaScript for the custom block.
- Saving the meta box
The first step has been explained in detail above.
CREATING A PLUGIN DIRECTORY AND A PLUGIN FILE
The plugin directory helps to organize all necessary files such as Javascript, PHP, CSS, and like, in one location.
It allows you to easily manage and share your custom meta box applications, on the other hand, a Plugin file is a way to get your custom applications.
Their functionality makes it essential for custom meta boxes in WordPress.
How do you create them?
To create a plugin directory, go to the wp-content/plugins directory in your WordPress installation, Inside the wp-content/plugins directory, create a new folder for your plugin and, and name it my-custom-plugin. Then create a file my-custom-metabox.php.
REGISTERING THE META BOX
Meta boxes are typically registered within your custom plugin. Use the add_meta_box function to register your meta box. To define the behavior or appearance, use the following code in your my-custom-metabox.php file:
/*
Plugin Name: My Custom Meta Box
Plugin URI: https://weplugins.com/blog
Description: A custom plugin for adding a meta box using block development.
Version: 1.0
Author: WePlugins
Author URI: https://weplugins.com
License: GPL2
*/
// Registering custom meta box
function my_custom_meta_box() {
add_meta_box(
'my_meta_box', // Unique ID
'My Custom Meta Box', // Title
'my_meta_box_callback', // Callback function
'post', // Post type
'normal', // Context
'high' // Priority
);
}
add_action('add_meta_boxes', 'my_custom_meta_box');
// Meta box callback function
function my_meta_box_callback($post) {
wp_nonce_field('my_meta_box_nonce', 'meta_box_nonce');
$value = get_post_meta($post->ID, '_my_meta_value', true);
echo '<label for="my_meta_field">Custom Field:</label>';
echo '';
}
</code></pre>
<h3>WRITING THE JAVASCRIPT FOR THE CUSTOM BLOCK</h3>
Writing javascript is very crucial in creating a meta box to the fact that it allows for the creation of a custom plugin panel that interacts with your registered meta fields.
Create a JavaScript file named <strong>index.js</strong> in your my-custom-metabox/ directory.
Here is a sample of how to write the JavaScript for a custom meta box:
const { registerPlugin } = wp.plugins;
const { PluginDocumentSettingPanel } = wp.editPost;
const { TextControl } = wp.components;
const { useSelect, useDispatch } = wp.data;
const { __ } = wp.i18n;
const MyCustomMetaBox = () => {
// Hook to get the current value of the meta field
const meta = useSelect((select) => select('core/editor').getEditedPostAttribute('meta')['my_custom_meta_key']);
// Hook to dispatch actions to update the meta field
const { editPost } = useDispatch('core/editor');
return (
editPost({ meta: { my_custom_meta_key: value } })}
/>
);
};
// Register the plugin with Gutenberg
registerPlugin('my-custom-meta-box', {
render: MyCustomMetaBox,
icon: 'admin-post',
});
SAVING THE REGISTERED META BOX
Before you save, there are some other verifications you must do which include;
nonce verification: use the code below to verify nonce.
if (!isset($_POST['meta_box_nonce']) || !wp_verify_nonce($_POST['meta_box_nonce'], 'my_meta_box_nonce')) {
    return;
}
This will protect your site against what is known as the Cross-Site Request Forgery (CSRF).
Data sanitization: to ensure the safety of data for storage, you need to sanitize your data.
Here is the code for sanitizing.
$my_data = sanitize_text_field($_POST['my_meta_field']);
After the data has been sanitized, you can now save it.
function save_my_meta_box_data(){

if (!isset($_POST['meta_box_nonce']) || !wp_verify_nonce($_POST['meta_box_nonce'], 'my_meta_box_nonce')) {
    return;
}
$my_data = sanitize_text_field($_POST['my_meta_field']);
update_post_meta($post_id, '_my_meta_value', $my_data);
}
add_action('save_post', 'save_my_meta_box_data');
With this, you have successfully created a meta box using block development.
Integrating Classical and Block-Based Meta-boxes
Do you know that the integration of the classical and Block-based meta boxes is very much possible?
Do you know that you can use both types of meta boxes in a single WordPress website?
Here is how it is done.
You registered both the classical meta boxes and block-based meta boxes and save them following the conventional process explained above in the same local environment.
Then you use PHP to add traditional meta boxes to the post-edit screen to enable visibility in the Gutenberg editor in the classic editor.
Use JavaScript to create and manage custom fields within the Gutenberg editor. This involves defining how these fields should appear and behave in the block editor.
Then you save both meta boxes. To save a classical meta box you handle the process manually by hooking into the save post action.
To save block-based meta-fields, use Gutenberg’s automatic saving capabilities to ensure all fields are properly typed.
By carefully following the above steps, you can successfully combine classical meta boxes with block-based meta boxes, allowing you to take advantage of both traditional and modern WordPress editing.
Here are some of the cases where they can be combined.
- When moving from a classical editor to Gutenberg.
- When creating more complex content types.
- You can combine both to improve your experience.
- When developing plugins that need to support both.
HOW TO ENSURE COMPATIBILITY AND AVOID CONFLICTS
- Proper usage of the hook: to ensure that both are compatible, make use of the appropriate WordPress hooks to register and save meta boxes. For classical, use hooks like add_meta_boxes and save_post.For block-based meta boxes, use a hook like init for registration.
- Ensure that the dependency of your JavaScript is correctly defined and avoid loading multiple versions of libraries like React.
- Ensure a graceful degradation, if one of the meta boxes cannot be loaded, make sure you can still be able to access the other.
- Adequate testing of the meta box in both the meta boxes
- Proper namespace and prefixing are crucial for avoiding conflicts with other plugins or themes etc.
TESTING AND DEBUGGING
Testing your meta boxes in the WordPress admin is very crucial in ensuring functions perform correctly and integrate smoothly with various plugins and themes.
Here are some of the tests.
- Data storage verification: Check the database to make sure that the metabox data is saved correctly and is correlating to the correct page or post.
- Nonce Verification: Ensure that the nonce verification process works correctly to prevent Cross-Site Request Forgery attacks.
- Different role testing: test the meta box with different users such as administrator, author, editor, etc. to ensure the usage of appropriate permissions.
- Test the meta box with various themes and plugins.
- Test the meta box in both the block-based editor and classical editor.
- Other testing includes security testing, automated testing, etc.
COMMON ISSUES AND TROUBLESHOOTING TIPS
- Data not saving: this could be as a result of incorrect meta key or missing nonce verification. The troubleshooting tips for this are to verify your nonce correctly and ensure that the data is properly sanitized before saving.
- JavaScript malfunction in Gutenberg: the possible cause of this might be incorrect script enqueueing or dependencies not loaded. To resolve this, enqueue your script correctly using the enqueue_block_editor_assets. Ensure that all needed dependencies such as wp-element are loaded.
- Wrong placement of meta box: A meta box appearing in the wrong place may be due to misplaced priorities.Troubleshooting tips. Check the settings and options in the add_meta_box function.
- Incompatibility with plugins or themes: This can be caused by conflicting hooks or conflicting actions. To solve this, you stop other plugins and themes to find the conflict, and then rework them one by one to find the source of the conflict
- Permission Errors: This can happen due to restrictions on user roles. Troubleshooting tips. Test with user roles to ensure that the parent box is only visible to those with the appropriate permissions. Testing in different browsers is also one way to fix this bug.
BEST PRACTICES AND TIPS
In this guide, we will be looking at the best practices and tips as regards security considerations, performance optimization, and user experience and accessibility considerations.
SECURITY CONSIDERATIONS:
- Nonce verification on one of the best practices regarding security issues it protects your website from Cross-Site Request Forgery.
- Checking user’s permissions.
- Sanitize your data before saving it to prevent malicious code from storing.
- Data validation.
- Regular security updates and audits.
PERFORMANCE OPTIMIZATION
- Lazy loading, load media content only when they are needed.
- Optimizing your script and styles.
- Set a limit to the number of meta boxes on a single post-edit screen.
- Choose and use only suitable data types.
- Avoid unnecessary code computation.
- Performance testing should be carried out to identify performance barriers etc.
USER EXPERIENCE AND ACCESSIBILITY CONSIDERATIONS
- Ensuring consistent design
- Use Javascript to update the form based on user interactions.
- Display a clear error message if validation fails and make it specific.
- The usage of feedback
- Easy navigation
- Screen reader support.
- Identifying errors by using descriptive messages and many more.
Conclusion
Creating classical meta boxes in WordPress involves various steps from registering the meta box using the add_meta_box function, to saving the data correctly by hooking into the save_post action, where you verify nonces for security and sanitize your data before saving.
For block-based meta boxes, you start by registering the meta fields with register_post_meta making sure you can access it via the REST API. Then, enqueue a JavaScript file that uses the Gutenberg APIs to create a custom meta box as a block and integrate it with the post editor.
This script possesses the functions to render the meta box UI and handle data changes, saves, and updates within the block editor.
Using block development offers various advantages. It allows for smooth integration with meta boxes and provides a more consistent and tailored experience for users. It allows for easier extension and customization and enhances both the functionality aspect and maintenance aspects of a website.
With the advantages listed above, users are encouraged to make use of block development because it enhances their sites optimally and deepens their understanding of the platform.