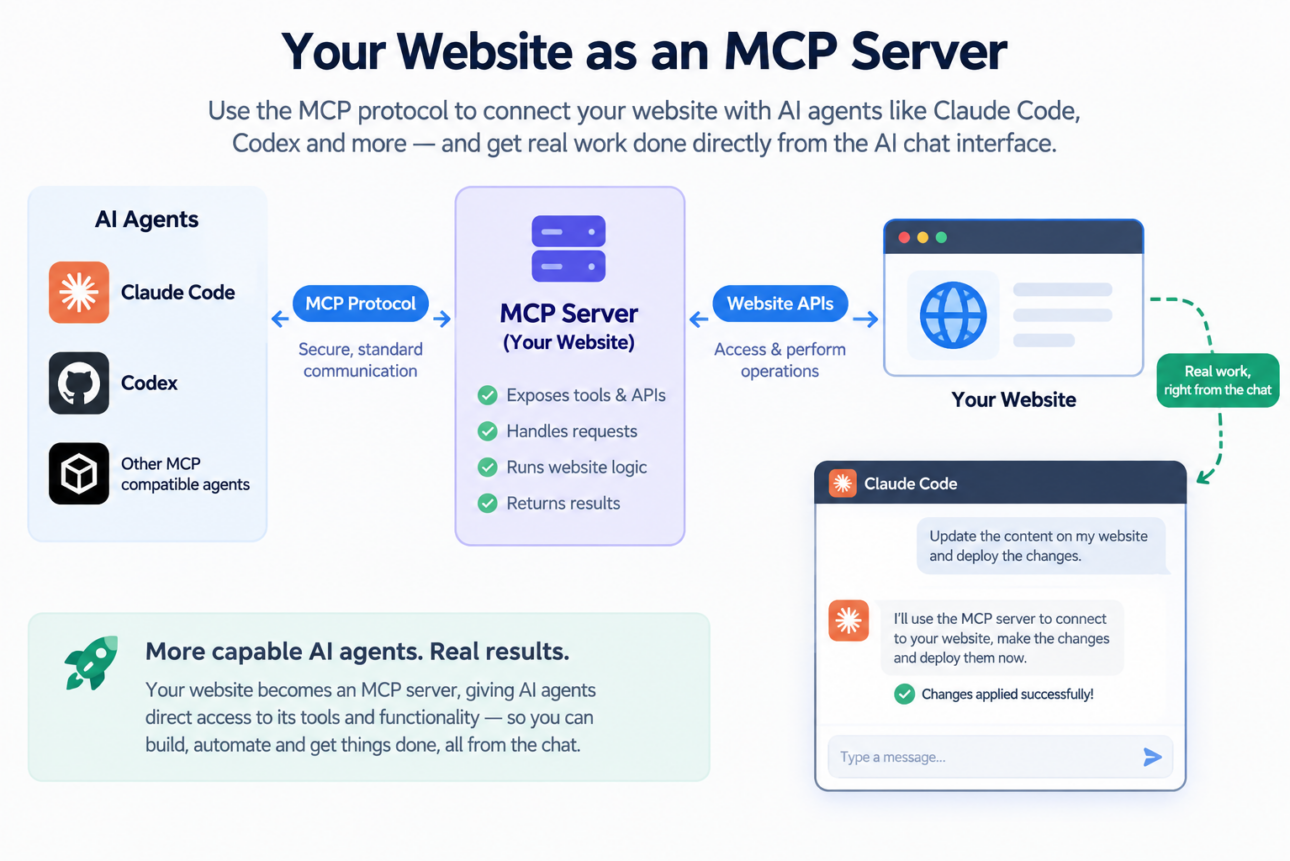
AI coding agents like Claude Code and Codex used to be tools you pointed at a codebase. Today, thanks to a piece of WordPress core infrastructure, you can point them at a live WordPress site instead — letting them draft posts, audit plugins, check site health, or manage content through the same permission system your human editors already use.
This guide explains the key terms — WordPress MCP, the Abilities API, and the WordPress MCP Adapter — and walks through every step required to turn your own WordPress site into an MCP server for AI agents, following WordPress’s own recommended approach.
What Can a Site Admin Do With AI Agents Managing WordPress?
Once your site is connected to an AI agent through the WordPress MCP Adapter, a site admin can let Claude Code or Codex:
- Draft and update content — write posts, edit existing pages, fix typos site-wide, or restructure a page’s blocks
- Manage media and comments — upload images, moderate comment queues, clean up spam
- Audit site health — flag outdated PHP compatibility issues or misconfigured permalinks
- Review SEO metadata — scan titles, meta descriptions, and structured data across posts
- Audit plugins, themes, and users — list what’s installed and review user roles
- Answer questions about the site — like “how many draft posts are older than six months?” without writing a single SQL query
None of this requires the agent to have your admin password, direct database access, or SSH into your server. It talks to WordPress through a defined, permission-checked interface — the same way a well-behaved plugin would.
Key Terminology: WordPress Abilities API, MCP, and the MCP Adapter
What Is the WordPress Abilities API?
The WordPress Abilities API is a WordPress core feature, shipped in WordPress 6.9, that lets plugins, themes, and core itself register discrete, well-defined “abilities” — things the site can do. Each ability has typed inputs, typed outputs, and a capability-based permission callback, wrapped in WordPress’s existing permissions system (current_user_can()).
A plugin author registers an ability like this:
wp_register_ability( 'my-plugin/summarise-post', array(
    'label'               => __( 'Summarise a post', 'my-plugin' ),
    'description'         => __( 'Returns a short summary of a published post.', 'my-plugin' ),
    'input_schema'        => array(
        'type'       => 'object',
        'properties' => array( 'post_id' => array( 'type' => 'integer' ) ),
        'required'   => array( 'post_id' ),
    ),
    'execute_callback'    => 'my_plugin_summarise_post',
    'permission_callback' => function () {
        return current_user_can( 'edit_posts' );
    },
) );
Nothing here talks to AI yet — the Abilities API is simply WordPress’s internal registry of “things this site can do.” Understand more about Abilities API from the official documentation.
What Is MCP (Model Context Protocol)?
MCP (Model Context Protocol) is an open standard that lets AI agents discover and use tools on your behalf — a database, a SaaS app, or in this case, your WordPress site. Your WordPress site runs an MCP server that exposes a list of “tools” it supports (like creating a post, updating a page, or searching content), each with a clearly defined schema. An MCP client — such as Claude Code or Codex — connects to that server, asks “what can you do?”, and then calls the right tool for the job as needed.
What Is the WordPress MCP Adapter?
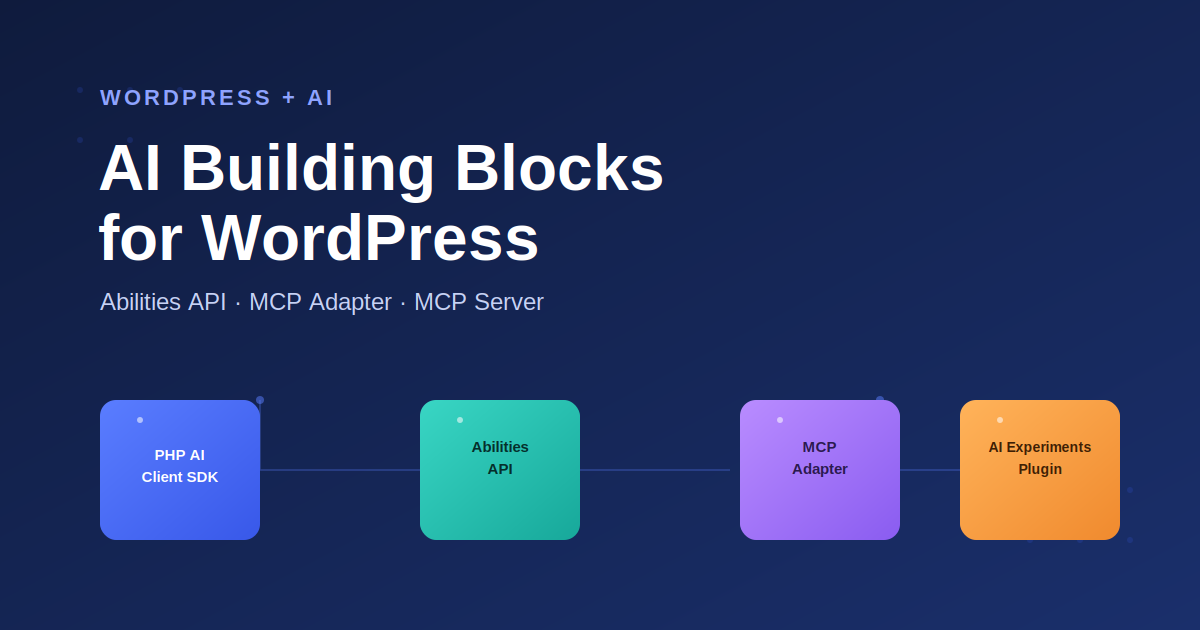
The WordPress MCP Adapter is the official WordPress plugin that bridges the two. Its a core component that creates the WordPress AI infrastructure. It reads the abilities registered on a site and republishes them over the Model Context Protocol as tools, resources, and prompts. An AI client connects to one endpoint, asks what the site can do, reads the schema for the action it wants, and calls it.
The Abilities API decides what exists. The MCP Adapter decides what an AI agent is allowed to see and call. That distinction matters: if an ability’s permission check is misconfigured, the adapter will faithfully expose something it shouldn’t.
| Layer | What It Is | Ships Where |
|---|
| Abilities API | Typed registry of what a site can do | WordPress core, since 6.9 |
| MCP Adapter | Exposes abilities as MCP tools | Official plugin / Composer package |
| MCP client | Claude Code, Codex, Claude Desktop, etc. | Your machine |
| Transport | How the client reaches WordPress | STDIO or HTTP |
One useful design detail: no matter how many abilities a site registers, an AI client’s tool list stays fixed at three meta-tools (discover-abilities, get-ability-info, execute-ability) on the default server. The agent discovers what’s available at runtime instead of overwhelming its context window with dozens of tool definitions.
How to Turn Your Live WordPress Site Into an MCP Server
This section follows the official WordPress AI Team’s recommended path using the WordPress/mcp-adapter package. Test on staging before rolling out to a live production site.
Step 1: Confirm You’re Running WordPress 6.9 or Later
The Abilities API is core infrastructure as of WordPress 6.9. Older tutorials that tell you to install a separate “abilities-api” plugin are outdated — that project is now archived because the API lives in core.
wp core version
If you’re below 6.9, upgrade WordPress first.
Step 2: Install the Official WordPress MCP Adapter
The fastest route is one WP-CLI command:
wp plugin install https://github.com/WordPress/mcp-adapter/releases/latest/download/mcp-adapter.zip --activate
If you manage your site as a Composer project instead:
composer require wordpress/mcp-adapter
Always use the release ZIP, not a raw Git clone — a source checkout is missing the bundled vendor folder and will fail on activation. If you prefer the dashboard, go to Plugins → Add New → Upload Plugin and upload the release ZIP.
Once active, WordPress automatically registers a default MCP server at /wp-json/mcp/mcp-adapter-default-server.
Step 3: Understand That Abilities Are Private by Default
This is the step most guides skip, and it determines whether your setup is safe. Abilities are private by default — an AI client can connect successfully and still see nothing until you opt individual abilities in.
To expose an ability, set meta.mcp.public to true on its registration:
wp_register_ability( 'my-plugin/summarise-post', array(
    // ...as above...
    'meta' => array(
        'mcp' => array( 'public' => true ),
    ),
) );
For abilities registered by core or by a plugin you don’t control, hook wp_register_ability_args to add this yourself rather than editing plugin files directly.
Step 4: Create a Dedicated WordPress User for the AI Agent
Don’t hand an AI agent your own admin login. Create a dedicated WordPress user with the narrowest role that works, and generate an Application Password against that user — not your own admin account.
In WP Admin: Users → Add New, assign a role like Editor (or a custom role scoped to just the capabilities your exposed abilities require), then under that user’s profile go to Application Passwords and generate one.
Step 5: Set an Explicit Permission Callback
This is the single most important security step for a WordPress MCP server. Without an explicit transport permission callback, the adapter falls back to is_user_logged_in() — meaning any logged-in user, including a Subscriber, could reach it.
function (): WP_Error|bool {
    if ( ! is_user_logged_in() ) {
        return new WP_Error( 'not_logged_in', 'Please log in', array( 'status' => 401 ) );
    }
    if ( ! current_user_can( 'manage_options' ) ) {
        return new WP_Error( 'insufficient_permissions', 'Admin access required', array( 'status' => 403 ) );
    }
    return true;
}
Also enforce HTTPS, keep write-capable abilities off any publicly reachable server, and rotate the Application Password whenever someone with access leaves the project.
Step 6: Choose a Transport — Local (STDIO) or Remote (HTTP)
STDIO runs the MCP server as a WP-CLI subprocess on your own machine, with no network exposure — ideal for local development:
wp mcp-adapter serve --server=mcp-adapter-default-server --user=admin
HTTP exposes the server over your live site’s REST API, authenticated with WordPress Application Passwords — this is what a live, remote WordPress site needs:
curl -s -D - -X POST "https://yoursite.com/wp-json/mcp/mcp-adapter-default-server" \
  --user "youruser:your-application-password" \
  -H "Content-Type: application/json" \
  -d '{"jsonrpc":"2.0","id":1,"method":"initialize","params":{"protocolVersion":"2025-11-25","capabilities":{},"clientInfo":{"name":"my-client","version":"1.0.0"}}}'
Two notes: the response includes an Mcp-Session-Id header that every subsequent request must repeat, and your permalinks can’t be set to “Plain” or the endpoint will return a 404.
Connecting Claude Code to Your WordPress MCP Server
Claude Code has native support for remote HTTP MCP servers. From your terminal:
claude mcp add --transport http wordpress https://yoursite.com/wp-json/mcp/mcp-adapter-default-server \
  --header "Authorization: Basic <base64 of user:application_password>"
Add -s user instead of the default project scope to make the connection available across every project on your machine. Verify it connected with:
claude mcp list
or run /mcp from inside a Claude Code session.
Connecting Codex to Your WordPress MCP Server
Codex CLI configures MCP servers in ~/.codex/config.toml:
[mcp_servers.wordpress]
enabled = true
url = "https://yoursite.com/wp-json/mcp/mcp-adapter-default-server"
http_headers = { Authorization = "Basic <base64 of user:application_password>" }
Restart Codex CLI, then run /mcp inside it to confirm the wordpress server shows up as available. This configuration file is shared with the Codex VS Code extension, so the connection becomes available there too.
Step 7: Start Using the MCP Connection with Your AI Agent
Once the configuration is complete, restart your AI agent and give it a prompt to perform an action on your WordPress website. The AI agent will automatically detect the available custom MCP connection for the website and check the tools, capabilities, and permissions it has access to.
Based on the available tools and permissions, the AI agent can then perform the requested action directly on your WordPress website. The site admin can review the changes, verify the work, and continue assigning additional tasks based on the capabilities and tools available through the MCP connection.
WordPress AI Agent Security Best Practices
The MCP Adapter’s permission model is sound but deliberately narrow in scope. It gives you a clean, typed, permission-checked way for an agent to call exactly the abilities you’ve exposed — it does not manage staging environments, snapshots, or rollbacks for you. Before letting an AI agent write to a live WordPress site:
- Keep a recent backup or staging clone on hand before running any agent against production
- Expose read-only abilities first (list posts, check plugin status, read SEO metadata) before enabling anything that publishes or deletes content
- Restrict write-capable abilities to the narrowest WordPress role and the strictest permission callback possible
- Never leave a transport permission callback unset — the default (
is_user_logged_in()) is weaker than most admins expect
Final Thoughts on Managing WordPress With AI Agents
The combination of the WordPress Abilities API, the official WordPress MCP Adapter, and AI coding agents like Claude Code and Codex turns your WordPress backend into something an AI agent can safely operate — without giving up the permission boundaries WordPress already enforces. Start small, expose read-only abilities first, and expand access as you build confidence in the workflow.